Tuesday, August 25, 2020

Stamparatus Part 3 - Creating a Jig ( to make an adorable Halloween gift card!)

Today's card features the oh-so-cute Have a Hoot bundle. Add a gift card to treat your special someone! Watch the video: Stamparatus Part 3 - Creating a Jig


Gather your supplies:

  • Early Espresso Card Base: 8-1/2" x 4-1/4", folded in half, scrap for owl
  • Whisper White: 4" x 5-1/4", scrap for cobweb
  • Plaid Tidings Designer Series Paper: 2-1/4" x 5-1/4"
  • Crumb Cake: scrap for label
  • Ink Pads: Early Espresso, Pumpkin Pie, Memento Black
  • Have a Hoot Bundle (stamps and dies)
  • Basic tools (Trimmer, adhesive, die cut machine, Stamparatus, etc.)


I love using the Stamparatus with a jig to stamp on die cut or punched paper pieces. A jig is simply a positioning tool and it will hold your paper piece in place perfectly so you can stamp image after image! The first step is to cut out the owl using the die. Then take a scrap piece of cardstock and cut or punch the same shape near the center - this will be your jig. Place a scrap piece of paper onto the base of the Stamparatus, place your owl image onto the clear plate, then stamp onto the scrap paper. Place the jig on top of the image, positioning it for perfect alignment. Make sure this is held in place securely with magnets (or even tape). Put your die cut owl shapes into the jig (it fits in like a puzzle), ink your stamp and stamp away. It's fast and easy to make multiples and they are perfectly aligned every time. It is much faster than stamping on your paper and lining up the die or punch to cut each one individually!

Score at 1-3/4" from the open side of your card base. Use a circle punch to cut a notch in the center. Fold this flap inwards and burnish the fold. Place adhesive along the top and bottom to seal it closed.

On your interior layer, stamp your sentiment in the center and adhere the spider web in the corner, trimming as shown. Attach this piece to the inside of your card. Add the plaid piece to the card front. Stamp your sentiment near the top of the label, leaving space for the owl. Color the owl with Stampin' Blends (or colored pencils, etc.) and add it to the label with dimensionals. Place adhesive just on the left side of this label and adhere it to the card front.


I love this design for gift cards - it is so easy to make and can be adapted for any holiday or occasion.  The only trick is that you have to have a label or shape large enough to cover your inside sentiment.

Karen


ThePowerOfACard@gmail.com

Etsy Shop: The Power of a Card

https://karensliwinski.stampinup.net 

Images Copyright Stampin’ Up!®


My current host code is: GKCCF977  Please use this for orders less than $150 

and you’ll get a special treat from me.  For order over $150, you will

qualify for host rewards from Stampin’ Up! (plus a treat from me!).


Product List

Wednesday, August 12, 2020

Stamparatus Part 2 - Large Sized Stamps

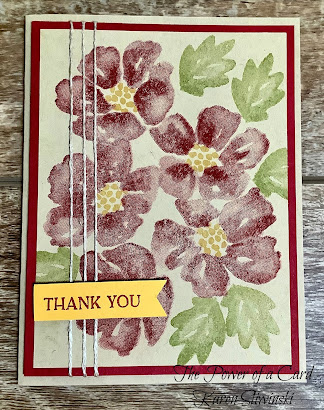
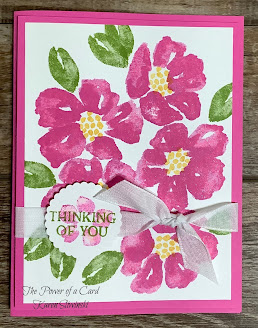
Have you ever struggled to use a background stamp or other large sized stamp? Most of us don't have blocks large enough to hold the stamp and if we do, it can be difficult to hold!  Let the Stamparatus come to the rescue!  Here is the card I made in my second Stamparatus video: Stamparatus Part 2 - Large Sized Stamps

ThePowerOfACard.blogspot.com   Karen Sliwinski   ©Stampin’ Up!

Gather your supplies:

Crumb Cake - 8-1/2" x 5-1/2", folded in half; 3-3/4" x 5"

Cherry Cobbler - 4" x 5-1/4"

Bumblebee - 1/2" strip for sentiment

Ink Colors: Cherry Cobbler, Pear Pizzazz and Bumblebee

Blossoms in Bloom stamp set

Linen Thread

Adhesives:  Multipurpose Glue, Stampin' Seal + and Dimensionals

Tools: Stamparatus, Trimmer, Bone Folder, Paper Snips


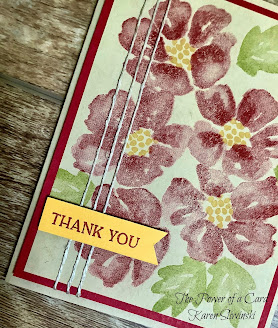
Position your Crumb Cake panel onto the base of the Stamparatus and anchor with the magnet.  Place your large floral onto this panel and close the cover to pick up the stamp.  Ink in Cherry Cobbler and close the cover to transfer the ink to your cardstock.  Remove the panel and stamp leaves with Pear Pizzazz and flower centers with Bumblebee.

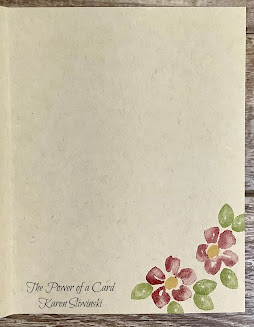
Add this panel to the Cherry Cobbler mat.  Wrap the Linen Thread three times around the left side of the floral panel, adhering with Seal +.  Mount this onto your card base with Dimensionals.  Using Cherry Cobbler, stamp your sentiment onto the strip of Bumblebee and trim with Paper Snips.  Add the sentiment with Mini Dimensionals. Decorate the inside as desired with some of the smaller flower and leaf images.

ThePowerOfACard.blogspot.com   Karen Sliwinski   ©Stampin’ Up!           ThePowerOfACard.blogspot.com   Karen Sliwinski   ©Stampin’ Up!

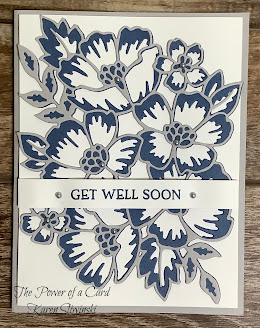
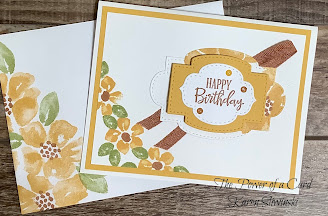
Just for fun, I wanted to show you some other cards I made using this stamp set:  The last one was was designed by another demonstrator and I'm sorry I can't remember her name to give her design credit - I loved it because she stamped on the wood grain DSP and wanted to show it to my customers too.  As you can see, there are dies that coordinate with this bundle, giving you plenty of design options to create gorgeous cards!


ThePowerOfACard.blogspot.com   Karen Sliwinski   ©Stampin’ Up!ThePowerOfACard.blogspot.com   Karen Sliwinski   ©Stampin’ Up!

ThePowerOfACard.blogspot.com   Karen Sliwinski   ©Stampin’ Up!

Karen


ThePowerOfACard@gmail.com

Etsy Shop: The Power of a Card

https://karensliwinski.stampinup.net 

Images Copyright Stampin’ Up!®


My current host code is: FE9EE9WC  Please use this for orders less than $150 

and you’ll get a special treat from me.  For order over $150, you will

qualify for host rewards from Stampin’ Up! (plus a treat from me!).


Product List
Crumb Cake 8-1/2" X 11" Cardstock
$8.75
Cherry Cobbler 8-1/2" X 11" Cardstock
$8.75
Bumblebee 8-1/2X11 Cardstock
$8.75
Blossoms In Bloom Photopolymer Stamp Set (English)
$22.00
Cherry Cobbler Classic Stampin' Pad
$7.50
Pear Pizzazz Classic Stampin' Pad
$7.50
Bumblebee Classic Stampin' Pad
$7.50
Stampin' Seal+
$12.00
Linen Thread
$5.00
Stamparatus
$49.00
Multipurpose Liquid Glue
$4.00
Stampin' Dimensionals
$4.00
Mini Stampin' Dimensionals
$4.00
Paper Snips
$10.00
Paper Trimmer
$25.00
Bone Folder
$7.00

Super Sized Dotted Circles 3D Embossing Folder

Embossing folders have been around for many years, but each year, Stampin' Up! surprises me and comes out with new and unique folders!  ...