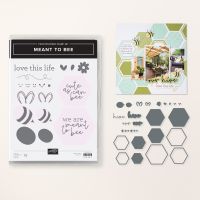
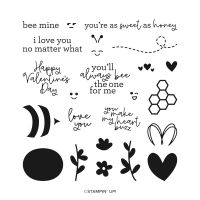
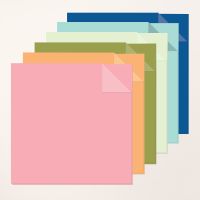
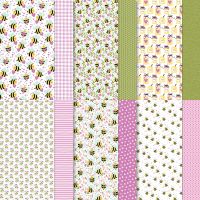
The Meant to Bee bundle is part of our scrapbooking line and it is a large set of stamps and dies (18 and 24, respectively)! I love that it coordinates with the Bee my Valentine stamp set from the annual catalog. The two bees in this set have dies rather than the punch from the valentine set and they are both larger and smaller - this means you can have small, medium and large bees! Cute as Can Bee is a 12" pack of Designer Series Paper - I show that to you in the video, as well as use it in some of my card samples. There are five sizes of hexagons - but they are a little different than you might expect - each die cuts out a frame and a smaller hexagon at the same time. You can see all of the stamps and dies in this handy chart:

I am also showing a fun technique for making a colorful background - I use blending brushes and three shades of ink to make a graphic backdrop for my cute as can bee card! And as always, I have cards to show a variety of ways to use the bundle (and friends). You won't want to miss the last card - it's a super cute bendy card (thank you Connie Stewart for the idea!).
Gather your supplies:- Cardstock: Daffodil Delight 8-1/2" x 5-1/2"(scored at 4-1/4"); Basic White (2) 4" x 5-1/4", 1-1/2" x 3"; Peach Pie Two Tone Cardstock 3-1/4" x 6-1/2"
- Bundle: Meant to Bee
- Stamp: Bee my Valentine
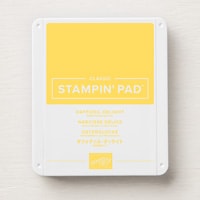
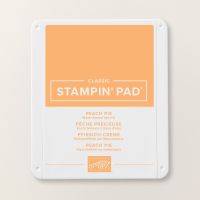
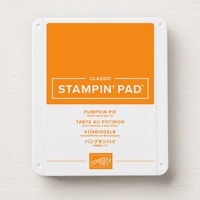
- Inks: Memento Black, Daffodil Delight, Peach Pie, Pumpkin Pie
- Adhesive and Tools including Blending Brushes
Begin by folding your card base in half, giving it a good crease and setting it aside. Now we can start making our background design on one of the Basic White rectangles. On the sample card I show at the beginning of the
video, I used a rectangular piece of scrap cardstock, but for this one, I decided to cut out the largest hexagon and use that as my mask. Using the lightest color (Daffodil Delight), position the hexagon and blend over one corner. Move the mask around and repeat, adding splotches of color at various angles and positions on the panel. Next, switch to another corner of the hexagon mask and do the same thing with Peach Pie and finally with Pumpkin Pie. The colors will overlap and blend with one another, so it's important to select colors that will look good together. When you're all done with the three colors, you may need to go back and add one color if a sections looks a bit empty. Adhere this background piece to the card front.
On the small piece of white, stamp the bee, wings and antenna. I like to stamp the stripes first, then add the yellow body. Use the dies to cut these pieces out and while at the Stampin' Cut & Emboss machine, cut out two hexagons from the two-tone paper. I used the two smallest hexagons - the larger of these cut on the darker side and the smaller one on the lighter side. Add the wings and antenna to the bee, then stamp the face. Stamp the sentiment in black ink in the lower right of the small hexagon. Position both hexagons on the card front to get the spacing like you want it (I centered mine). Keep the inner hexagon there and adhere the hexagon frame, then add Dimensionals to pop up the solid hexagon. Add the bee with a few more Dimensionals.
For the inside panel, I stamped a sentiment from the Bee my Valentine set in black. I added a Daffodil Delight heart (the one from Bee my Valentine) over the words and then adhered this to the inside of my card. In the corner of my envelope, I stamped a large heart in Daffodil Delight and flanked it with two small hearts in Peach Pie and Pumpkin Pie. Which version of this do you prefer? I liked using the hexagon shape as my mask because it has continuity with the dies and I love the yellow tones with the bee. However, for the love theme of the first sample, I think the colors are perfect. Bottom line - I adore them both!
In my next card, I used the smallest hexagon on Pool Party Two Tone cardstock. I layered the lighter solid hexagon on top of the frame, rotating it so the points are opposite each other. I used three strips of the Cute as Can Bee DSP (the bees are 1" wide, while the other two are 3/4" wide) on my white panel. For my bee, I stamped the body in Lemon Lolly for a softer bee and did the wings in Pool Party to match the paper.
I love this next sample because it shows off both sides of the DSP at once. My base is a quarter sheet of Pretty in Pink and the DSP is 4" x 8", scored at 5-1/4". Layering of hexagons, both on the inside and on the front panel makes a beautiful focal point. Adding a few of the die cut flowers is the perfect touch to match the paper.
This next card is a labor of love! I cut out a LOT of little flowers (good thing there are dies enough to cut six at once!). I then popped them up on a panel of Petunia Pop Two Tone Cardstock. I matted this with a panel of Basic White, on which I drew a border with my Stampin' Write Marker. I added my sentiment label and then on all the remaining flowers, added a rhinestone in the center. It took some time, but the result is stunning!
This one is quick and easy! Cut four 1-1/2" squares of DSP and add them to a rectangle of Basic White. Mat this with Petunia Pop and add to a Basic Black card base. After adding a sentiment, add a bee and a heart on two of the squares - bam! You're done.
For my next card, I changed up the color scheme from the DSP pack. Again, it's a simple card using 1-1/2" squares of white (matted with 1-5/8" squares of Basic Black). I stamped the flower center in Daffodil Delight, then added petals in Pumpkin Pie, Melon Manbo and Gorgeous Grape. Popping them on-point leaves just the right space for the sentiment and makes this a clean and simple card.
My last card is so very adorable!! I am very thankful to demonstrator Connie Stewart for teaching this bendy card layout! It features the flowers from Bee my Valentine and both bees from the Meant to Bee set. Before attaching the bendy panel, I stamped the flowers, sentiment and dashed bee flight lines. Then I added the panel to the base before attaching the bees with a single Dimensional. The back side has an additional sentiment, more flowers and space to write a personal message. I simply adore that this card can stand up on a desk for easy display, yet fit perfectly in an envelope!
Now that I've featured a few of the scrapbooking products in my recent videos, I hope you will check them out, even if you're only interested in making cards! There is so much more to Stampin' Up! than just what you see in catalogs. Happy stamping!
Karen
ThePowerOfACard@gmail.com
Etsy Shop: The Power of a Card
Shop my Store!
https://ThePowerOfACard.blogspot.com
Images Copyright Stampin’ Up!®
Find me on Facebook - The Power of a Card or
Join my Facebook Group (The Power of a Cardmaker): https://www.facebook.com/groups/1042676296088278/?ref=share
My current host code for March is: RFH4TBKK.
Please use this for orders less than $150 and you’ll get a special treat from me.
For orders over $150, you qualify for host rewards from Stampin’ Up! (plus a treat from me!).