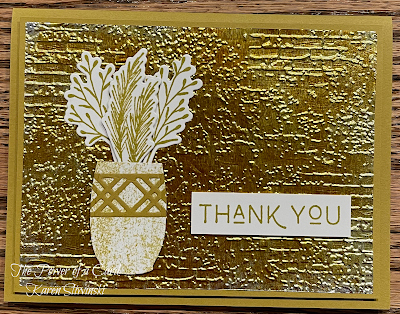
I adore using embossing folders in my card making projects! They are very versatile, inexpensive, and can be used in so many ways. I am going to show you a variety of tips and tricks when using these folders, including some you may not have tried! The two sets of folders I am using are called Swirls of Magic and Seasonal Cheer Mini and both of them are from the July release of Online Exclusive products. Many of my samples feature other newly release products - enjoy!
Gather your supplies:
- Cardstock: Azure Afternoon 4-1/4" x 11", scrap; Basic White 4" x 5-1/4", 3-3/4" x 5", 3/4" x 1-1/4"; Azure Afternoon Two Tone 4" x 5-1/4"
- Stamp Bundle: Balloon Festoon
- Ink: Azure Afternoon
- Embossing Folder: Swirls of Magic
- Adhesive and Tools including a blending brushes and cardboard
The first technique is partial embossing and there are two variations of this method. I want to give a shout out to Demonstrator Michelle Pepper, who reminded me of this variation I did years ago, but forgot about. In order to do this technique, you will need some cardboard, like the pieces you get in a specialty pack of Designer Series Paper (DSP). My card features a large balloon which is partially embossed, so I cut out four layers of the third largest balloon from the cardboard, cutting off the bottom "knot". When these are glued together, they equal the thickness of plate #3 and will replace one of them when we emboss.
Take the 3-3/4" x 5" piece of white and place it in the embossing folder. Place this folder on plate #1, then place the cardboard balloon where you want it, on top of the folder. Add the final plate #3 and run this through the Stampin' Cut & Emboss Machine (SCEM). You will notice that the embossing extends out a little bit from the edge of the cardboard balloon, but that the remaining part of the white panel remains un-embossed. Now take the inside panel of white and turn it sideways so that just a little bit fits in the end of the embossing folder - I like to use the black line as a guide. Run this through the SCEM with the normal sandwich (plate #1, plate #3, embossing folder with paper, plate #3). Only the side of the panel has the embossed pattern.
Now it's time to color the balloon with a blending brush. If you want a softer look, just use a small brush to add color over the embossed shape. If you want a more defined edge, you'll need to make a stencil. On a scrap piece of cardstock, cut out the same size balloon as the cardboard. Draw a pencil line around the outside edge, about 3/16" from the edge and cut along this line. Since I didn't want the bottom part of the balloon, I placed tape over that section before cutting so it prevented me from adding color where I didn't want it. Place the stencil over your balloon and add color until you get the shade you want.
Before assembling, cut out a balloon string on the scrap of Azure Afternoon and adhere this to the balloon with a bit of glue. Add this white layer to the lighter side of the two tone cardstock, then add this to the card front. (As a reminder, whenever I have a card base in this "hotdog" orientation, I score it at 5-1/2" as this will give a nice smooth fold. If you don't, the grains of the paper will give you a bumpy crease!) Trim the string to the bottom of the card base.
Stamp the sentiment on the small strip of white and flag the ends as I show in the video. Pop this up on the right side of the balloon so that the points of the strip touch the right side of the card. Stamp the inside sentiment on the remaining white panel, then add two balloons (both stamped off) and their strings. Add this to the inside of the card. Stamp two more balloons (one full strength and one stamped off) on the envelope to finish the card.
My next two cards are also partially embossed with the Swirls of Magic. For the first one done in Barely Blush, I placed a panel of 2026-2028 In Color Pearlized Specialty paper about half way into the embossing folder and partially embossed like we did for the inside of the first card. The sentiment is from Sending Salutations (stamped in Basic Gray) on a label from the Forever Florals dies. I used the stars from Balloon Festoon to decorate the label before popping it up on the card front. Lastly, I tied some Barely Blush Bordered Ribbon around the shimmery panel before popping this up on the my Barely Blush card base. I used the sentiments from Reason to Celebrate to complete this gorgeous wedding card. The second card was partially embossed top and bottom, leaving an open space in the upper middle for my sentiment, which is from You're the Best stamp set. I heat embossed this sentiment in white (Basics Embossing Powder set) and added two Natural Matte Dots. My interior sentiments are from the Reason to Celebrate (this is a very useful sentiment set to have!).
This lovely leaf card uses the first of the three folders from the Seasonal Cheer Mini embossing folders and shows what I would call the traditional usage of an embossing folder. Because I wanted the embossed portion on the left side of my card, I had to emboss a panel in the same color as my card base and adhere it to the card front. Adding a subtle tone on tone texture really elevates your card. I used the Simply Leaves bundle for my leaves, which were stamped in Crushed Curry, Cajun Craze and Pecan Pie. The label is punched with the Rounded Rectangle punch and the embellishments are Adhesive-Backed Metallic Gems. I love the envelope for this one - you'll have to watch the video to see the edge stamped with cute little leaves!
For the second card using the leaf embossing folder, I started with a panel of Basic white and added Granny Apple Green, Daffodil Delight, Pumpkin Pie, Poppy Parade and Real Red with blending brushes. Then I spritzed this panel with water and let it dry completely before cutting it up into the shapes I needed. I embossed the upper and lower segments, but flipped them around so that the pattern of the colors was interrupted. My sentiment was stamped in black using You're the Best stamp set. After gluing the panels to the white piece, I spritzed it with Wink of Stella (I forgot to mention that in the video - darn!). For my inside, I did partial embossing of the leaves on the bottom and used sponge daubers to ink the sentiment in multiple colors. My envelope flap was also embossed with the leaves to finish the coordination.
The next tip is to use the brayer to color the raised portion of an embossed piece. I selected the bats folder and embossed a panel of white. For this technique, I recommend using a much larger piece of paper than you need. Ink up the brayer with black ink and roll it over the bats. You will notice that on the edges, the brayer often leaves extra ink - this is because there is nothing to support the brayer past the edge and hence, having a larger piece allows you to punch out a circle (aka moon) from the center and avoid the unwanted inked area. I used the Web of Fun bundle (which is not one I would normally get but my grandson wanted me to get the spider and his web!) to add my die cut sentiments and spider on the inside. The web is stamped on both the inside and envelope.
How do you get a full card front panel from a mini embossing folder? This next sample shows you how I did that! Partially emboss the bottom half of the panel of black, then turn the panel around and emboss the remaining half. Because I used the bats folder, you could hardly tell where the two embossings met. However, this seam would be more noticeable with other folders. To cover the seam, add ribbon or a strip of paper. My spider web for this card is cut from the Shimmering Stripes Specialty DSP, which has tiny little lines of glitter - so pretty! More spiders/webs and words complete the card, way ahead of time for Halloween!
The last technique was done on a panel of Real Red Two Tone cardstock using the candy cane folder. Because this paper has a white core, when you emboss, then sand off the top layer of color, you can get the stripes of white to show! My sentiments are from the Festive Cheer stamp set and the label is from Nested Essentials. The best part (in my humble opinion) is the Real Red & White Adhesive-Backed Peppermints! They really pop on the Smoky Slate card base!
Were any of these tips and tricks new to you? Think of the possibilities of using other shapes for partial embossing - so much fun! If you want to see more of the newly released line-up, check out my website. I appreciate your business and would love to see you at a class.
Karen
ThePowerOfACard@gmail.com
Shop my Store!
If you don’t have an on-line account with me as your demonstrator, please go to my store and get one.
https://ThePowerOfACard.blogspot.com
Images Copyright Stampin’ Up!®
Find me on Facebook - The Power of a Card or
Join my Facebook Group (The Power of a Cardmaker): https://www.facebook.com/groups/1042676296088278/?ref=share
When you shop, you earn rewards! For any purchase above $20, you will earn 10% in rewards to spend on a future purchase. And you don’t have to use them all at once as you can save up rewards to get something big for free!
Product List


![Balloon Festoon Bundle (English) [ 167606 ]](https://assets1.tamsnetwork.com/images/EC042017NF/167606s.jpg "Balloon Festoon Bundle (English) [ 167606 ]")
![Azure Afternoon 8 1/2" X 11" Cardstock [ 161719 ]](https://assets1.tamsnetwork.com/images/EC042017NF/161719s.jpg "Azure Afternoon 8 1/2\" X 11\" Cardstock [ 161719 ]")
![Azure Afternoon 12" X 12" (30.5 X 30.5 Cm) Two Tone Cardstock [ 166656 ]](https://assets1.tamsnetwork.com/images/EC042017NF/166656s.jpg "Azure Afternoon 12\" X 12\" (30.5 X 30.5 Cm) Two Tone Cardstock [ 166656 ]")
![Basic White 8 1/2" X 11" Cardstock [ 166780 ]](https://assets1.tamsnetwork.com/images/EC042017NF/166780s.jpg "Basic White 8 1/2\" X 11\" Cardstock [ 166780 ]")
![Swirls Of Magic Embossing Folder [ 168179 ]](https://assets1.tamsnetwork.com/images/EC042017NF/168179s.jpg "Swirls Of Magic Embossing Folder [ 168179 ]")
![Azure Afternoon Classic Stampin' Pad [ 161663 ]](https://assets1.tamsnetwork.com/images/EC042017NF/161663s.jpg "Azure Afternoon Classic Stampin' Pad [ 161663 ]")
![Blending Brushes [ 153611 ]](https://assets1.tamsnetwork.com/images/EC042017NF/153611s.jpg "Blending Brushes [ 153611 ]")
![Detail Scissors [ 170902 ]](https://assets1.tamsnetwork.com/images/EC042017NF/170902s.jpg "Detail Scissors [ 170902 ]")
![Multipurpose Liquid Glue [ 110755 ]](https://assets1.tamsnetwork.com/images/EC042017NF/110755s.jpg "Multipurpose Liquid Glue [ 110755 ]")
![Stampin' Dimensionals [ 104430 ]](https://assets1.tamsnetwork.com/images/EC042017NF/104430s.jpg "Stampin' Dimensionals [ 104430 ]")
![Basic White Medium Envelopes [ 159236 ]](https://assets1.tamsnetwork.com/images/EC042017NF/159236s.jpg "Basic White Medium Envelopes [ 159236 ]")
![Paper Trimmer [ 152392 ]](https://assets1.tamsnetwork.com/images/EC042017NF/152392s.jpg "Paper Trimmer [ 152392 ]")
![Stampin' Cut & Emboss Machine [ 149653 ]](https://assets1.tamsnetwork.com/images/EC042017NF/149653s.jpg "Stampin' Cut & Emboss Machine [ 149653 ]")