Tuesday, September 22, 2020

Postage Stamp Layout Featuring Watercolor Pencils


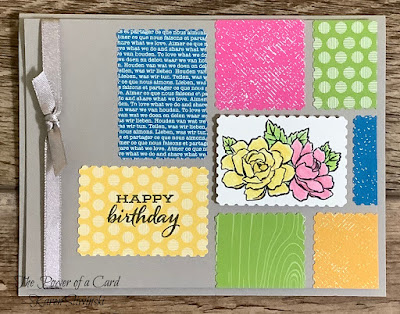
When our new catalog came out in June, I thought the Posted for You bundle was adorable.  Then when my upline, Dena Rekow, made a card with an arrangement of colorful papers cut with the punch, I was hooked!  To make things even better, another companion stamp set called Festive Post was released in our August - December Mini Catalog.  Building off what Dena did, I created this adorable card to show you.  Watch my video to see how I made it:  Postage Stamp Layouts Featuring Watercolor Pencils

ThePowerOfACard.blogspot.com   Karen Sliwinski   ©Stampin’ Up!

Here is my twist - I didn't use the sets that were designed to go with the punch!  I wanted to use something different and inspire you to look beyond the bundles as shown in the catalog.  You probably have a lot of stamp sets that would work with the punch.  I chose the Four Season Floral set (found only in our beginner brochure) because it is a great starter stamp set that works year round and for birthdays, thank yous and just about any card.  

Gather your supplies:

  • Gray Granite cardstock: 8-1/2" x 5-1/2", folded in half for the base, 4" x 5-1/4"
  • Four Season Floral stamp set
  • Whisper White: scrap
  • Variety of Designer Series Paper  (DSP)
  • Watercolor Pencils and Blender Pens
  • Memento Black Ink Pad
  • Rectangular Postage Stamp Punch
  • Cutting tools and adhesives

Stamp your floral image onto the white scrap.  Color with the pencils - you don't have to do a wonderful job coloring and you can add several colors onto the image so that when you blend them with the blender pens, you get depth of color and smooth shades!  The blender pen is really magical - you will see the image come to life as you color.  Remember to rub the blender pen out on scrap paper between colors and at the end so that it is clear for the next time you use it.

Cut this image with the punch.  Cut out more postage stamp shapes from DSP in colors to complement your flowers.  Arrange them however you desire onto the gray granite layer, remembering that some of them will hang off the edge and be trimmed.  Choose a lighter one and stamp your sentiment on it.  When your are pleased with the arrangement, lightly tack your floral center piece down (you will take it off later and pop it up with dimensionals).  Begin adhering the pieces and when they are all secure, trim the parts that hang over.  Then take off your floral piece, add dimensionals and replace it on the card.

Next take your ribbon and tie it around a marker (I like a Sharpie because it is tapered and the ribbon will slide off when I'm done).  Tie a knot, leaving a few inches of length on one end.  Slide it off the marker and you'll be left with a loop.  Cut this at an angle in the center of the loop and you will be left with a perfectly tied knot.  Use glue dots to adhere this to the back side of the card.  Trim the ribbon and adhere the remaining end to the other end of your panel.  This not only saves ribbon, but makes knot tying super simple!

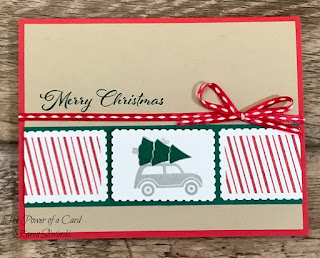
Pop up this panel onto your card base and you're done!  Here are a few additional cards made with this postage stamp punch layout.  The first is using the Festive Post set and I simply used the punches to make a decorative stripe across the card.  Wouldn't you love to get a cute little card like this for Christmas?

ThePowerOfACard.blogspot.com   Karen Sliwinski   ©Stampin’ Up!

The next one features wood grained papers and the Press On stamp set - perfect for guys and gals alike.  The last one doesn't use colored DSP at all.  Instead, I used the Sailing Home stamp set and a single color of paper that was embossed with a variety of textures.  Let your imagination soar!  

ThePowerOfACard.blogspot.com   Karen Sliwinski   ©Stampin’ Up!ThePowerOfACard.blogspot.com   Karen Sliwinski   ©Stampin’ Up!

Karen


ThePowerOfACard@gmail.com

Etsy Shop: The Power of a Card

https://karensliwinski.stampinup.net 

Images Copyright Stampin’ Up!®


My current host code is: Y6C6TERN  Please use this for orders less than $150 

and you’ll get a special treat from me.  For order over $150, you will

qualify for host rewards from Stampin’ Up! (plus a treat from me!).

Product List
Gray Granite 8-1/2" X 11" Cardstock
$8.75
Whisper White 8-1/2" X 11" Cardstock
$9.75
Brights 6" X 6" (15.2 X 15.2 Cm) Designer Series Paper
$11.50
2020–2022 In Color 6" X 6" (15.2 X 15.2 Cm) Designer Series Paper
$11.50
Four Season Floral Photopolymer Stamp Set (English)
$14.00
Tuxedo Black Memento Ink Pad
$6.00
Watercolor Pencils
$16.00
Watercolor Pencils Assortment 2
$12.50
Blender Pens
$12.00
Rectangular Postage Stamp Punch
$18.00
Gray Granite 1/4" (6.4 Mm) Shimmer Ribbon
$7.00
Mini Glue Dots
$5.25
Bone Folder
$7.00
Paper Snips
$10.00
Stampin' Dimensionals
$4.00
Multipurpose Liquid Glue
$4.00
Paper Trimmer
$25.00

Wednesday, September 9, 2020

Stamparatus Part 4 - Making Multiples

Now that it is fall, many of us will start planning to make our Christmas cards! Using the Stamparatus, this process can be streamlined and so much easier!  Once you have your plates set up and components cut, you can stamp one right after the other in quick succession!  Watch the video here:  Stamparatus Part 4 - Making Multiples.

ThePowerOfACard.blogspot.com   Karen Sliwinski   ©Stampin’ Up!

Gather your supplies:

  • Very Vanilla Cardstock: Base 8-1/2" x 5-1/2", folded in half and burnished, and 3-5/8" x 2-1/2"
  • Poinsetttia Place DSP: 3-7/8" x 2-3/4" and 1" x 2-3/4"
  • Christmas Gleaming Stamp Set
  • Ink Pads: Old Olive and Real Red
  • Banners Pick a Punch
  • Basic tools: Stamparatus, Trimmer, Bone Folder, Multipurpose Glue, Dimensionals


ThePowerOfACard.blogspot.com   Karen Sliwinski   ©Stampin’ Up!
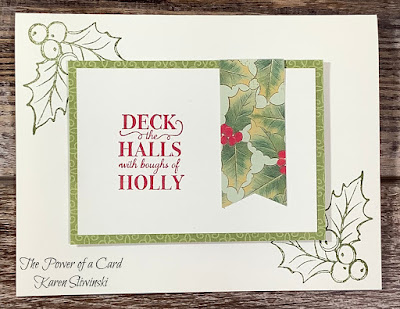
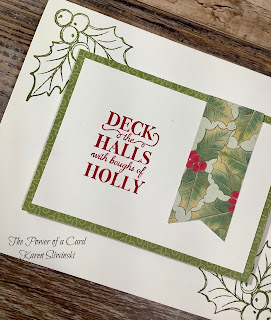
Place your folded card onto the base of the Stamparatus.  Position the holly leaves in the upper left corner. Ink with Old Olive and stamp.  Rotate the card 180 degrees and stamp again (leaving you with images in opposite diagonal corners).

Leave your holly stamp on the plate, but turn the plate over in the Stamparatus.  Place the small piece of very vanilla into the corner of the Stamparatus and position the sentiment near the left side.  Stamp the Sentiment in Real Red.  You can repeat the stamping process for as many cards as you want to make.  After all your stamping is done, you're ready to assemble.

Mat the vanilla piece with the DSP.  Cut a flag into the end of the DSP strip (either with the punch or by hand using snips).  Position this strip onto the right side, folding over the top end (about 1/2" will fold to the back).  Adhere this with Multipurpose Glue.  Pop up the assembled piece onto the center of your card with Dimensionals.

You can set up the inside of the card on your second plate and then you'll have everything ready to make as many cards as you like!  The beauty of this is that you don't  have to do them all at once since the set-up is ready to use until you take it off.  And, you can do this while watching TV, talking on the phone, or hanging out with your family since you don't have to really think about what you're doing!

The card I demonstrate in my video is one of the card designs from my Christmas Card Class.  When you purchase the basic supplies, I will send you videos and instructions to make 8 different card designs, plus a bonus roll of a coordinating ribbon and some additional vanilla cardstock.  I will also include a video with an introduction to stamping so that anyone can make these cards, even someone who hasn't stamped before.  You'll have enough materials to make at least 70 cards.  Details are included on this flyer.


Wouldn't this be fun to do with your friends or family?  Why not host a card class and earn free products for yourself?  Contact me and I will get you started.  If you don't want to host an event, contact me to get the current host code for this class (this lets me know I need to send you the videos and bonus materials). 

Karen


ThePowerOfACard@gmail.com

Etsy Shop: The Power of a Card

https://karensliwinski.stampinup.net 

Images Copyright Stampin’ Up!®


My current host code is: GKCCF977  Please use this for orders less than $150 

and you’ll get a special treat from me.  For order over $150, you will

qualify for host rewards from Stampin’ Up! (plus a treat from me!).

Product List

Super Sized Dotted Circles 3D Embossing Folder

Embossing folders have been around for many years, but each year, Stampin' Up! surprises me and comes out with new and unique folders!  ...