Showing posts with label Stencils. Show all posts

Tuesday, February 18, 2025

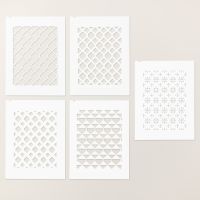
Fun with the Linked Together Decorative Masks

Decorative Masks, or stencils, are a great tool in your stamp room because they are inexpensive, versatile and an easy way to add texture and interest to your cards.  While they are part of the Linked Together bundle (stamp set, dies and decorative masks), I am focusing just on the masks today.  I am using a variety of stamp sets to illustrate their versatility.

The masks have some features that make them easier to use.  First, they are numbered - you can use them in any combination and I will be using 1, 2 and 3 in the video.  This is also an easy reference to describe which one I'm using.  Second, they have a notch in the top right corner that will allow you to make a mark there and at one corner to get perfect alignment when using combinations of them on the same piece.  Third, they are easy to clean.  Just run them under water and they are good to go.  When using them, I like to put a tiny bit of Seal adhesive under the piece I'm coloring to hold it in place, then a little transparent tape to hold the stencil.  Another useful tip is to use a block to hold the stencil in place as you are coloring - this will keep your fingers cleaner and it holds the stencil better than your hand.


Gather your supplies:

  • Cardstock:  Blueberry Bushel 8-1/2" x 5-1/2"(scored at 4-1/4"); Basic White (2) 4" x 5-1/4", 3" x 3"; Granny Apple Green 2" x 3-1/4"
  • Bundle:  Linked Together (just the masks and dies)
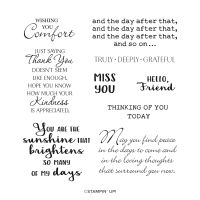
  • Stamp:  Hope you Know
  • Ink:  Blueberry Bushel
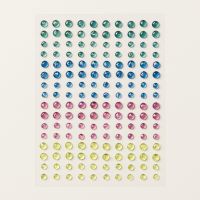
  • Embellishments:  Tinsel Gems 4-pack, Brushed Brass Butterflies
  • Adhesive and Tools including Blending Brush and transparent tape
Before I tell you the steps to make the card, I do have to apologize for the weird lighting in the video.  For whatever reason, the light seems to flicker brighter then darker.  I hope this doesn't distract you too much!


As I mention in the helpful tips above, I like to stick the white panel to a scrap piece of paper with just a tiny bit of Seal adhesive.  I place this in two spots, which helps prevent the card from rotating.  Then position mask number 1 over the panel so that there is an even border around the edges (the measurements of the mask are 3-3/4" x 5" so you'll have an small portion that is un-inked).  Make a mark at the notch and then at one or two of the other corners.  If desired, add a little piece of tape to hold the stencil in place.

Use a large blending brush to add a light layer of Blueberry Bushel over the entire surface.  Swirl the brush in both directions to get full and uniform coverage.  I like to start at the top and work down, using a block to hold the mask when it is inky.  Remove this mask and repeat the process with numbers 2 and 3, each time, adding a little more depth in color.

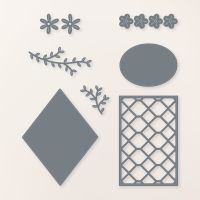
Cut out the die cut pieces (four flowers and the oval from the small white piece and two leafy branches from the Granny Apple Green piece.  Stamp the sentiment in Blueberry Bushel on the oval.  Do a dry fit with the branches before gluing them in place.  Add the flowers with Mini Glue Dots and add blue gems to the centers.  

To assemble the card, glue the stenciled background to the front to the card base, which has been folded in half and creased with a bone folder.  Use Dimensionals to pop up the oval in the lower left corner.  As a final touch, add a small and large Brushed Brass Butterfly to the oval.

For the inside of the card, take mask 1 and using just the ink left on the blending brush, add a little bit of color to the lower right corner of the second white panel.  Stamp the sentiment over this inked section and adhere with glue.  Use the mask again to do the same on the lower left corner of the envelope. 


This next card is very masculine and features mask 4.  I used Gray Granite ink and paired it with Night of Navy.  For the sentiments, I used the Linked Together stamp set.  The Natural Tones Linen Thread (which comes in Night of Navy, Cajun Craze and Garden Green) adds a splash of color without adding bulk or a bow.


Cuteness alert for this one!  The Darling Dinos Bundle is so adorable that just about any card made with this set is going to be great.  But this background makes it fabulous!  I again used mask 4 and did the first layer in Melon Mambo.  To add the second layer (Pumpkin Pie), I had to turn the mask over and upside down.  You don't have the notch to align the mask, but it is simple to do with this pattern.  I love how you get a third colors from this technique where the two colors overlap.  This means that when choosing colors, it is better to pick analogous colors so they mix well.   I colored my dino with Stampin' Blends and popped everything up over that White Woven Ribbon.  It's my favorite card of this video by far!


My next sample uses just mask 5.  Here I used tone on tone to add just a little bit of interest to the background of this card front.  I showed this card a few weeks ago when I worked with the Everyday Arches dies, but wanted to show it again because it's a good example of using the mask in a subtle way.  The card features the Bloom Impressions DSP, Daffodil Delight Satin Ribbon and With You in Mind stamp set.


Masks 1 and 5 are used in this sweet card.  I first stenciled using mask 2 and Bubble Bath.  Then I layered Berry Burst on top of that soft pink using mask 5.  The heart and sentiment on the front are from the Hearts of Elegance bundle and the Iridescent Striped Trim ribbon adds a beautiful touch.  For the inside, I used Comforting Thoughts, making this a perfect card for my coworker to send to her Aunt who's dealing with breast cancer.  I stenciled a light layer of mask 5 on the envelope corner too.


The Meant to Bee Bundle is new from our scrapbooking line of products and is the star of this adorable card!  Instead of just doing a full panel, I chose to ink only the corners using mask 1.  I inked Daffodil Delight over a piece of Lemon Lolly in the corners at an angle.  After adding the bees and sentiment, I decided it needed the last bit of my roll of black and white gingham ribbon (sadly retired) - I think it was the perfect touch!  For the inside sentiment, I used Bee my Valentine, along with a little more masking at the corner.


My last sample features mask 2 and Shimmery White Embossing Paste.  While this card has the paste on Basic Black cardstock, you could do it on white cardstock for a more subtle look, or even color the paste with re-inkers.  It is important to drop the mask into a basin of water right away after using it, as the paste will dry quickly and then be difficult to clean if you don't.  When it was dried, I loved how it had undertones of aqua and pink, so I paired it with Summer Splash, Pretty in Pink and the Everyday You & Me Bundle.  The sentiments were from Simply Said and Hooray for Surprises.  For the knot, I used Summer Splash Bordered Ribbon and a piece of the White Woven Ribbon that I cut into small strips.

I did try a few things that didn't work out too well.  I tried using a Stampin' Write marker to trace the shapes in the mask.  This wasn't horrible, but I didn't like how the pen marks looked (bigger dots of color at the start/end point).  I tried the same thing with Blends, but due to the nature of blends, they extended beyond the mask a little bit and that didn't set with me either.  I did try a fine tip pen, but that was just too wimpy.  However, I think I could play around a bit more and perhaps fill in the area of tracing - this might work for smaller pieces.  I'll keep thinking of more ways to used these masks ... who knows what you might see in future videos!

Karen


ThePowerOfACard@gmail.com

Etsy Shop: The Power of a Card

Shop my Store!

https://ThePowerOfACard.blogspot.com

Images Copyright Stampin’ Up!®


My current host code for February is: 9EYKDYWY.

Please use this for orders less than $150 and you’ll get a special treat from me.

For orders over $150, you qualify for host rewards from Stampin’ Up! (plus a treat from me!).  And don't forget - you get free products for Sale-a-Bration until the end of Feburary.


Product List

Wednesday, May 1, 2024

Introducing Basic Beige

Today is the day!  The new Annual Catalog is available!! This is always so exciting for me and my customers.  The new catalog is jam packed with great information and tips in addition to all of the new products.  There are so many great pages showing all sorts of techniques such as watercoloring, color theory, and card design.  Besides the new In Colors (five of them), there is also a new neutral called Basic Beige.  There is an ink pad, cardstock and a great ribbon in this new basic shade.  I am sharing lots of cards made with the new color, along with a few of the new products from the catalog.

To get a feel for this new color, I showed pieces in all of the lighter neutrals in the video - Basic White, Very Vanilla, Basic Beige, Crumb Cake, Smoky Slate and Gray Granite.  It is clear that our new color fills a gap and will be quite popular (my daughter told me that is is a trendy color right now!).  I also stamped each of the ten colors in our Neutrals color family and Basic Beige on Basic White, Very Vanilla and Basic Beige cardstock so you could get a feel of how each of them look on the different colors you are likely to use as a card base.  Now let's make the first card of my many samples.


Gather your supplies:

  • Cardstock: Basic Beige 5-1/2" x 8-1/2" and (2) 4" x 5-1/4"
  • Stamp Bundles:  Layers of Beauty and Unbounded Love
  • Ink:  Basic Beige, Peach Pie, Pumpkin Pie, Cajun Craze, Lemon Lime Twist and Granny Apple Green
  • Embossing Folder:  Exposed Brick 3D
  • Blending Brushes
  • Adhesive and Tools

This gorgeous card is elegant and soft in appearance - almost vintage in look.  Start by inking the large rose cluster in Basic Beige and stamping it on the corner of one of the Basic Beige panels.  Some of the leaves will be off the panel and that's good.  To color the flowers, we will be using the layering stencils that are part of the bundle.


Start by using stencil #1 and placing it over the stamped roses.  It is helpful to use the centers of the small flowers to get a good alignment.  I also like to use some painter's tape to hold down the corner of my panel and stencil as this will help prevent movement while adding color.  Either size Blending Brush will work as you apply ink to the flowers.  Be sure to swirl both clockwise and counter clockwise to get the best coverage.  For stencil #2, blend with Pumpkin Pie and finish with Cajun Craze and stencil #3.  The result will be beautifully colored flowers that remind me of no-line watercoloring.

Moving on to the leaves, use stencil #4 to color with Lemon Lime Twist and finish up with Granny Apple Green and stencil #5.  Stamp the sentiment (from the Unbounded Love set) near the top corner of the panel in Pumpkin Pie, then cut out the flower cluster and sentiment with the dies from the coordinating bundles.  While at the Stampin' Cut & Emboss Machine, emboss the second panel of Basic Beige with the Exposed Brick embossing folder.

Assemble the card starting with the embossed panel - place this directly on the card base.  I like to use extra adhesive on large embossed panels to eliminate any warped edges.  Pop up the cluster of flowers in the corner of the embossed panel with Dimensionals.  Add the outer ring of the sentiment label to the embossed panel near the top right corner and add the center part of the label with Dimensionals.  Stamp the Happy Birthday sentiment on the inside with Pumpkin Pie and finish with the small flower bundle in Basic Beige in the corner of the inside as well as the envelope.

Originally, I made my sample with pinks - Pretty in Pink, Bubble Bath and Berry Burst.  You don't have to use three different colors - just by layering one or two colors, you can still get the deeper shades by adding more ink.  Think of the possibilities - Bubble Bath, Fresh Freesia and Highland Heather; Pool Party, Coastal Cabana and Summer Splash; Lemon Lolly, Daffodil Delight and Crushed Curry.  For the leaves, try Old Olive and Mossy Meadow or Garden Green and Shaded Spruce. So many choices!!

For my first sample, I used the Unbounded Love Bundle and stamped the leaves in Basic Beige on the same colored cardstock to make a patterned background.  I paired it with Pretty Peacock and even with a ribbon, I think this makes a nice masculine card.  Similarly with the wagon card, I stamped a patterned background, this time with Sketched Plaid.  For the flowers, instead of stamping them on Basic White, I stamped on Basic Beige and colored them with Blends.  Keeping with the Beige theme, I stamped the sentiment on Basic Beige and fussy cut it out.  The wagon and flowers are from the Filled with Fun Bundle, an on-line exclusive.


The new Leaf Collection background stamp was used with Versamark ink and clear embossing powder on a Basic Beige panel.  Then I used Blending Brushes to color over the embossed images in Crushed Curry, Pumpkin Pie and Real Red.  I made the piece larger than I needed so I could trim off a little piece to decorate the inside of the card.  I used the Meandering Meadows DSP for this lovely sympathy card.  When you fold out the flap, the entire width of the paper is displayed in all it's glory.  The Beige picks up the tones in the path and sky nicely.


For the next card, I used a base of Old Olive and embossed my beige panel with the new So Swirly Embossing Folder.  The leaves (and sentiment) are from Layering Leaves and stamped with Old Olive and Mossy Meadow on the same colored cardstock.  The label is from the Unbounded Love dies and the punch is called Bough.  To finish off the card, I spritzed with my Old Olive Stampin' Write marker.  
The second card uses a base Blackberry Bliss and the very lovely Flowers of Beauty (another new stamp set).  Just like I did on the Pretty Peacock card above, I stamped the flower all over a Basic Beige panel with Basic Beige ink.  The Modern Oval punch is perfect for my sentiment and the bow in Basic Beige is the perfect addition to complete this card.

In the new catalog, you'll find DSP that coordinates with our new basic - this one is the County Woods DSP.  I embossed a panel of Misty Moonlight with the Timber 3D embossing older and created my sentiment with the Wanted to Say dies.  What a perfect masculine birthday card!

And lastly, another card with the Filled With Fun bundle.  I had made the wagon and flower during a watercolor class I recently taught and decided to pair it with some bright, happy colors and use a Basic Beige Base.  Watercolor paper is not quite white and not quite vanilla, so the "thanks" was cut from that paper.  I liked the beige as the card base and I think the Blueberry Bushel and Poppy Parade really stand out on it!

I love the new neutral and I think you will too!  I hope you are inspired by my card samples - I'm sure there will be plenty more cards made with the new Basic Beige in future videos.  My apologies for the funky format of this blog post - sometimes the program has a mind of it's own and it won't let me place the text and photos where I want them to be.  Instead of fighting with the program any longer, I am hoping you understand!

Karen


ThePowerOfACard@gmail.com

Etsy Shop: The Power of a Card

Shop my Store!

https://ThePowerOfACard.blogspot.com

Images Copyright Stampin’ Up!®


Find me on Facebook - The Power of a Card or

Join my Facebook Group (The Power of a Cardmaker):  https://www.facebook.com/groups/1042676296088278/?ref=share


My current host code for May is: NWEFW3BW.

Please use this for orders less than $150 and you’ll get a special treat from me.

For orders over $150, you qualify for host rewards from Stampin’ Up! (plus a treat from me!).

Product List

Make Vibrant Backgrounds with Watercolor Paper & Stamping

Watercoloring is one of my many hobbies, so when I can use a watercolor technique in my card making, that's just a bonus!  When you comb...