If you've followed me for any length of time, you know how much I love a good die set and this one certainly qualifies as a good one! While this is part of a bundle, I am really focusing on the dies in this video. You can pair so many sentiments with these dies, which makes them very versatile.
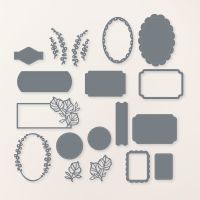
There are sixteen dies in this set, but some of them cut two shapes at once, so you have even more choices. I have created my die sheet to illustrate how each of the dies looks when cut. Several of the pieces are very thin and for these, I really like to cut multiples and glue them together (which makes them almost like chipboard). The dies are also great for combining (I could have done more with this, but after having twelve cards to show, I had to limit myself!). Several of them are also good for shortening or lengthening (you'll see two examples where I shortened the die cut piece).
Gather your supplies:
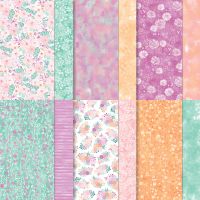
- Cardstock: Melon Mambo 8-1/2" x 5-1/2"; Basic White 3-7/8" x 5-1/8", 4" x 5-1/4", 2" x 2-3/4"; Unbounded Beauty DSP (3) 1-1/8" x 4-7/8", 1/2" x 5-1/4"
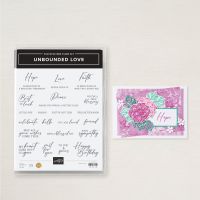
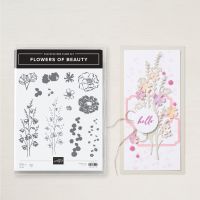
- Stamp Sets: Unbounded Love and Flowers of Beauty
- Dies: Unbounded Love
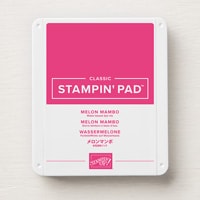
- Ink: Melon Mambo
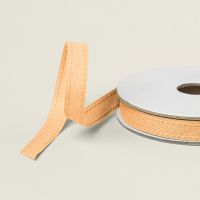
- Ribbon: Peach Pie Bordered Ribbon 5"
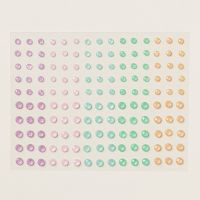
- Embellishment: 2024-2026 In Color Shimmer Gems
- Adhesive and Tools
There are so many gorgeous papers in this pack of DSP, I had a difficult time choosing which ones to use for the video. I made my sample with Summer Splash and Petunia Pop, but paired the Peach Pie papers with Melon Mambo and I love them both! I'm sure you will find a variety of combinations, all just as gorgeous.
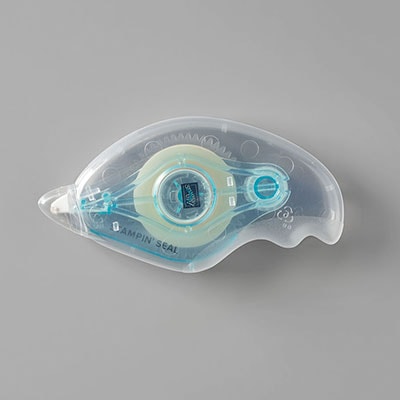
For the front of the card, add the three strips of DSP to the 3-7/8" x 5-1/8" rectangle of Basic White. I like to start with the two outer pieces, leaving an even border on the top, bottom and side. Then it's easy to place the center panel in between them and get it evenly spaced. Wrap the ribbon around this panel, securing it on the back side with Seal. Then mount this piece onto your card base with Dimensionals.
Glue the 1/2" strip of DSP to the inside White rectangle. Stamp both the interior sentiment and Happy Birthday sentiment on the label with Melon Mambo Ink. While the paper coordinates with Pretty in Pink, I really like how the Melon Mambo makes it pop! Add the label over the ribbon with Dimensionals, and glue the inside panel in to finish the card. For the envelope, I stamped the flower image that matches the paper. You could also use a piece of the DSP to cover the flap like I did for my Summer Splash version.
The next sample is a lovely fun fold that really shows off the Thoughtful Journey 6" x 6" DSP. I love how you feel almost the full sheet of the scene on this card! As you'll notice, I shortened the die to fit my sentiment - it's quite easy to do this and having a smaller label allows more of the scenery to show. I used Mossy Meadow for the card base, which coordinates so well with the trees.


The scalloped rectangle die used on this pretty floral card is one that makes two shapes with one cut. After stamping my sentiment on the interior piece, I popped that up on the card with Dimensionals before adding the border part of the die around it. The stamp bundle used to make the flowers is Layers of Beauty and they were inked in Peach Pie, Pumpkin Pie Cajun Craze, and Lemon Lime Twist. The background paper is Basic Beige and the Cajun Craze panel is embossed with the Exposed Brick 3D folder.
Next is a bright and happy birthday card using the smaller of the two circle dies. I cut 10 circles from scraps of cardstock (mostly from the Brights color family). I also used the Flowers of Beauty Dies to cut out small white flowers. I love that die because it cuts out a so many flowers in one strip. I adhered the circles the Basic White panel, then matted this with a thin layer of Basic Black and added the flowers with glue dots. The sentiments are from the Best Family Ever. I drew a straight line on either side of the sentiment for a quick enhancement. My tenth circle was used on the inside, along with another label that I shortened to fit the word Friend. Rhinestone Basic jewels add the final touch.
Often, the DSP from Stampin' Up! is so gorgeous that you don't need to add much more to make a beautiful card. Such is the case with this next example. I cut out two layers of Gorgeous Grape and one layer of DSP for my floral oval frame. After sticking them together, all I needed to add was my sentiment (from So Sincere) and a few gems (Purple Fine Shimmer Dots). I used some of the individual flower stems (some from the DSP and some from plain cardstock) to decorate the inside and envelope.
My next sample is fun because it uses the dies in a different way. From Basic White, I cut several of the leaf frames and stacked them together. Then, I colored the frame with Stampin' Blends in Lost Lagoon and Pretty Peacock. I kept one piece of the white interior panel for my sentiment, which is from Thoughtful Wishes. Then, I cut the two individual leaf dies in white and used them to stencil leaves on a panel of Lost Lagoon. I used a Blending Brush to add Lost Lagoon and Pretty Peacock to fill the panel with leaves. I also did that on a strip of White to use on the inside. The final fun part is that I adhered the leaves used to stencil (now totally covered in the two colors) onto the envelope for a decorative touch.
This card is quick and easy and uses the odd shaped die near the top of my chart in a totally different way - as a bow! The package is from the Bright & Beautiful DSP, the "ribbon" is a 1/4" strip of Bubble Bath and it's mounted on a panel of Berry Burst. I used my bone folder to help bend the die to form the two sides of the bow. The sentiments are from Sweetly Scripted and Hooray for Surprises and are surrounded with Adhesive-Backed Shiny Sequins.
As I mentioned, I really love stacking the thin dies to give dimension. I cut out three of this die in Basic White and one more in Pretty Peacock. The sentiment (Something Fancy) was embossed in Silver on the Pretty Peacock interior piece. I saved the white interior pieces for another card. The Silver & White Sheer ribbon is added to the panel of Thoughtful Designs Specialty DSP which was matted with Pretty Peacock. The Adhesive-Backed Pearl Trio adds a touch of bling and the Pretty Peacock frame die was used on the inside of the card to surround that sentiment (So Sincere).
The leftover interior parts from the previous card were stacked together and stamped in Misty Moonlight ink using the Simply Said stamp set. I put them on top of another die, which I colored with Pool Party ink and a Blending Brush. The paper is the County Woods DSP and the ribbon accent is the Basic Beige Bordered ribbon. The interior sentiment is from Hooray for Surprises (which I love using for birthday cards!).
This card uses the parts that you might throw away after cutting out the lovely scalloped oval. When I saw them, I immediately thought of comic books (like Batman and Superman) and that gave me the inspiration for this fun card. I used my Mini Alphabet dies to cut out the letters in Basic White. It is far easier to cut all the letters out in white and color them with Blends than cutting them out in each color! FYI, I colored in Blueberry Bushel, Daffodil Delight, Poppy Parade and Shy Shamrock. The sentiment (Happiest Day) was embossed in white on Basic Black cardstock.
My last sample is another fun fold, also featuring the same paper used in my demonstration. I embossed a panel of Petunia Pop with the Distressed Tile 3D folder and mounted that to a quarter sheet of cardstock. The fun fold part is from Berry Burst and four panels of DSP. The belly Band holds the pretty die cut label. You guessed it - I cut four of them and used the insides for the previous card and the rest for this card! My sentiments are from So Sincere and Something Fancy and the envelope was stamped with Flowers of Beauty.

I hope this video and blog have inspired you to get this wonderful set of dies and have fun with them! You will continue to see cards I've made with them and I know they will be a staple for a long time to come in my stamp room.
Karen
ThePowerOfACard@gmail.com
Etsy Shop: The Power of a Card
Shop my Store!
https://ThePowerOfACard.blogspot.com
Images Copyright Stampin’ Up!®
Find me on Facebook - The Power of a Card or
Join my Facebook Group (The Power of a Cardmaker): https://www.facebook.com/groups/1042676296088278/?ref=share
My current host code for July is: TMEASKYN.
Please use this for orders less than $150 and you’ll get a special treat from me.
For orders over $150, you qualify for host rewards from Stampin’ Up! (plus a treat from me!).







No comments:
Post a Comment