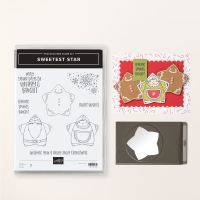
One of my favorite bundles from the new mini catalog is the Sweetest Star. The stamps are adorable and are easily cut out with the star punch. But there was one image in the catalog (on page 47) that really captured my heart - the wreath made from thee-dimensional stars! The catalog provided instructions on how to score the star to make them 3D, but there was nothing to show how to make the wreath! How did they attach the stars and to what did they attach it to? So when I went on vacation, I took along a few stars and pondered. I talked about it with my family and sought their ideas. I came up with a plan!
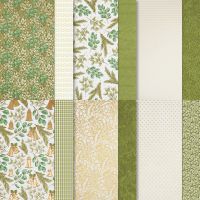
So when I got home, I set to work making stars and testing out my idea. With just a few modifications, my theory proved to be successful. In my video, I show you step by step how to make this wreath and I promise, it's not too challenging! I used the sophisticated Season of Green & Gold DSP to demonstrate my wreath building technique, but also show one made from the Take a Bow DSP pack (along with two cardstock colors) for a more whimsical wreath.
I also have a few cards using the bundle to give you even more inspiration. I make one of them in a recent Creativity in a Snap video and I've shown a few others on my Facebook page, but there are a few that nobody has seen - I think you'll like them too.
Gather your supplies:- Cardstock: Season of Green & Gold Specialty DSP (3) 2-1/2" x 9-1/2"; Thick Very Vanilla 6" x 6"
- Stamp Bundle: Sweetest Star
- Dies: Deckled Circles
- Inks: Versamark
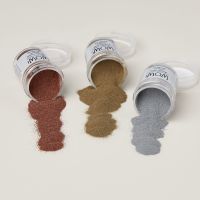
- Other: Metallics Wow! Embossing Powder
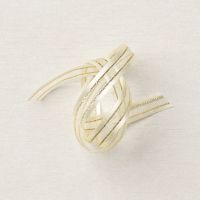
- Ribbon: Satin Edged Ribbon (retired) 6"
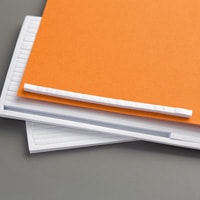
- Adhesive and Tools, including Foam Strips
To make the wreath, you will need twelve stars. I decided to use three patterns from the DSP pack and place them in a repeating pattern. After punching them out, you need to score them from point to opposite valley. I used my paper trimmer, but you could use a scoring board too. Each star will have five score lines. Fold the star in half along each line, then start with a point, alternate the direction of the fold.
Next we have to create a base. I used the largest and third largest dies from the Deckled Circles. If you don't have those dies, you need about a 6" diameter ring that is about 1/2" wide - perhaps you could use a plate to trace a circle. I cut out two of these at the same time from a 6" square of Thick Very Vanilla. I attached a loop of ribbon (using one from last year's catalog because it looks so great with the paper) to the bottom ring, then adhered the top ring to sandwich the ribbon ends.
Next we have to build the adhesive mechanisms where we will attach the stars. Place the first four dimensionals at north, south, east and west of the ring base. Add two more dimensionals between each of these, spacing them evenly. Double up one foam strip and cut this into twelve pieces. Peel off the backing and place one double foam piece on top of each dimensional. Peel off the foam strip backing and top with one more dimensional. You'll end up with springy adhesive "towers" that will adhere to the stars. As you place each star down, give it a little press to make sure enough of it touches the dimensional. I placed them so that the overlap was the same on all of them, but you could vary up the positioning so that some stars were totally on top or bottom.
Lastly, we need to make the star with the sentiment. You can punch out a star from the center of the ring base. I stamped the sentiment in Versamark ink and embossed with the gold powder. Decide where you want to place this star, then add a thick line of glue on the ridges of the stars where it will sit. Allow this to set before lifting the wreath. After it was set, I added a small ribbon bow at the top of the star.
The other wreath is more whimsical and I used three patterned papers and two colors of cardstock. I honestly thought the cardstock stars would be harder to form into the dimensional stars, but they weren't! Since the colors/patterns weren't repeating like the one in the
video, I determined my arrangement before starting to attach. Which version do you like better?
I also have several cards to show you too - couldn't leave you without the full load of inspiration! All of them are pretty self explanatory, so I'll just show you the photos. I really loved the last one that was done in Melon Mambo and Lemon Lime Twist! It's a fun variation from tradition! Which is your favorite?
Let me know if you made a wreath from stars for yourself - I'd love to hear what colors you selected! Let the season of holiday crafting begin!
Karen
ThePowerOfACard@gmail.com
Etsy Shop: The Power of a Card
Shop my Store!
https://ThePowerOfACard.blogspot.com
Images Copyright Stampin’ Up!®
Find me on Facebook - The Power of a Card or
Join my Facebook Group (The Power of a Cardmaker): https://www.facebook.com/groups/1042676296088278/?ref=share
My current host code for September is: AKM44ZQW.
Please use this for orders less than $150 and you’ll get a special treat from me.
For orders over $150, you qualify for host rewards from Stampin’ Up! (plus a treat from me!).
Product List








No comments:
Post a Comment