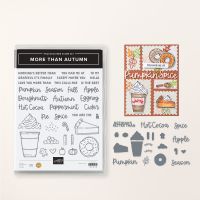
Fall is one of my favorite seasons! I love the changing leaves, cooler temperatures, pumpkin treats and the fun family gatherings during this season. So when the new mini catalog was released, this bundle was at the top of my wish list! This bundle has 36 stamps (twelve of those have coordinating dies) and 23 dies (ten are standalone shapes)! The words a builder phrases in two sizes - which means you can mix and match to make your sentiments. The little decorative shapes include an apple, pumpkin, candy cane, cinnamon stick, heart, gingerbread man and straw. There is even a die so you can make a dollop of whipped cream for your pie from the large whipped cream for your drink! So much fun to be had!
Let's first look at the stamps and dies in my handy chart. I love doing this because it really helps me design my cards when I can see all the combos in one place. (It's also fun making them!)
In the card I make during the video, I show two techniques - one is paper piecing (here's another video that shows paper piecing in more detail: Paper Piecing with Patterned Paper), and the second one is using a blending brush and masking paper to create a focal area on the front of our card.
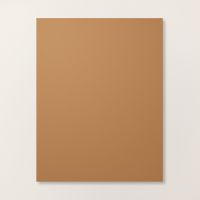
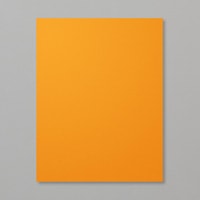
Gather your supplies:- Cardstock: Pecan Pie 8-1/2" x 5-1/2"(scored at 4-1/4") and 3/4" x 1-1/4"; Pumpkin Pie 4" x 5-1/4"; Basic White 3-7/8" x 5-1/8", 7/8" x 5-1/2", 3" x 1-3/4" and 4" x 5-1/4"
- Stamp Bundle: More Than Autumn
- Die: Greetings of the Season
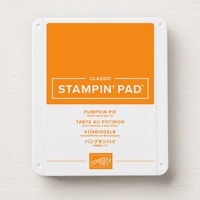
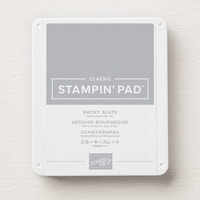
- Inks: Memento Black, Pumpkin Pie, Smoky Slate
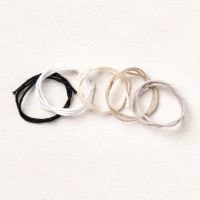
- Ribbon: Baker's Twine Essentials 6"
- Masking Paper
- Adhesive and Tools including a Blending Brush
As we begin to make our card front, we need to cut a shape from the Masking Paper. I chose one of the larger tags from the Greetings of the Season dies. Start by pealing off one part of the backing. Before adding this to the 3-7/8" x 5-1/8" panel of white, stick it on your shirt or pants to get rid of a little bit of the stickiness. Position it right in the middle of the panel and then peal off the remaining backing (again, sticking it on your clothes first). I added a little piece of transparent tape over the hole so I wouldn't get and inky dot in the middle of my white space!
With the large Blending Brush, load it with Pumpkin Pie ink. Normally when we blend color onto our cardstock, we like to get a smooth blend by blending in circles. For this application, I want rays of color, much like you see sun shining through clouds. Place the brush in the center of the masking paper and swipe outwards towards the edge of the panel. You will get stripes or bands of color. Overlap these bands of color as you work around the panel. Adhere this panel to the Pumpkin Pie piece.
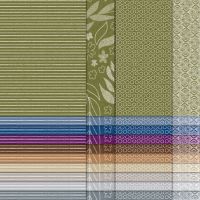
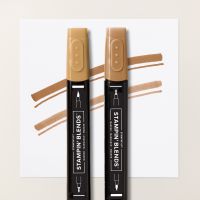
Stamp eight gingerbread men on the strip of white and color them with the Pecan Pie Blend. Stamp the cup in black and the whipped cream in Smoky Slate on the small rectangle of white. Stamp the cup again on the DSP so that the cup band is inked (we will cut this and do paper piecing). Using the dies, cut out all of pieces, including the word spice from the scrap of Pecan Pie cardstock.
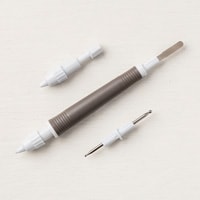
Start by assembling the cup. Trim the cup band right on the stamped line and adhere this to the cup. Add the whipped cream on top. Make a small slice in the whipped cream using the cutting blade in the Take Your Pick Crafting Tips (or an exacto knife) so that you can slip one of the gingerbread men into the whipped cream. Add Mini Dimensionals at the head of six gingerbread men and position them in an arc for the sweet banner. Once they are in place, it's easy to string the Baker's Twine under them and attach to the back of the front panel. Stamp your sentiment, making sure you leave space for the word Spice. Lastly, adhere Spice and the the decorated cup (with Dimensionals).
For the inside, stamp the sentiment on the remaining white panel but leave enough room to add the final gingerbread man above it. Stamp a few more gingerbread men on the envelope corner or along the right edge. Remember to stick a piece of scrap paper inside the envelope before coloring with Blends so that you won't get bleeding on the back side of your envelope!
When I made my sample card, I chose Real Red as my pop of color instead of Pumpkin Pie. I love the pairing with the gingerbread men and it seemed like a natural choice. However, when I blended the color for the front panel, the red lost it's intensity and yielded an overall pink look. While it still looks OK (and the streaking or rays look really good), it just wasn't what I had envisioned. Perhaps if I had done more and more blending, it would look red enough, but I was worried I would lose the "rays" of color that I had wanted. Which one do you like better?
The first card I made when I first got my bundle was a CASE of one in the catalog on page 49. This is a wonderful way to use new sets - copy something that is already made and change it to fit your style or taste. I adore pumpkin stuff - cookies, pies, beer, muffins, etc. so this layout suited me just great.
For my next layout, I was inspired by Krispy Kreme Doughnuts. When that hot fresh light is on, those doughnuts just melt in your mouth! Thankfully, there isn't one of them very close by so I'm not tempted too often! Before embossing with my Forever Plaid 3D embossing folder, I cut out three Stylish Shapes circles so the doughnuts could peek out from the layer below. I draped the Hot die cuts over the openings draw your eye to the sweets below. I used Adhesive Foam Strips to pop up the plaid layer - it gives lots of support for this flimsy top panel.
This next card has simple elegance. The Leaf Fall 3D embossing folder pair wonderfully with leaves in this set. I added a tag from the Greetings of the Season Dies and adhered the leaves to that label. Notice that I kept the innards of the die cut leaves so they were whole leaves, not just the outline as I showed in my chart. A little Linen Thread was used to add the final touch.
Whenever I see apple cider, I think back many, many years ago when I went to a gathering where we made fresh cider - it was incredible! Everyone brought apples and we dumped them all together to grind and press them into cider. It was the most delicious cider I ever had. So this card is a salute to that memory. I used the Timber 3D embossing folder on a panel of Crumb Cake, but instead of leaving it plain, I used a Blending Brush to add a light coloring of Pecan Pie ink. The tag (another from Greetings of the Season) was cut fro the Country Woods DSP and the ribbon is the Pecan Pie Center Stripe ribbon.
I got inspiration for this next card by one I saw on a Demonstrator Facebook page (my apologies to the creator - I didn't remember your name). I used the A Little Latte DSP pack paired it with Pumpkin Pie, Peach Pie, Calypso Coral and Petal Pink and I was very happy with the results!
While this next one is a bit fussy, I wanted to show that you don't have to color your doughnuts. I used the die to cut out the base of my doughnuts from Pecan Pie. Then I stamped the doughnut again on Petal Pink and Calypso Coral cardstock. Here is where the fuss comes - cutting them out. After they were cut, I used the side of the brush tip end of my black Stampin' Write marker to color the cut edges. This simple thing will give it a more polished look. The background is the Dashing Designs 3D embossing folder (which is rapidly becoming one of my favorites!).
The last card shows off two techniques - paper piecing and brushing on Metallic Enamel Effects (
How Do I Make Pearlized Backgrounds and Images). I also used the Christmas Labels Bundle for the sentiment - it was absolutely perfect for this adorable peppermint hot cocoa card! The paper is Take a Bow 6" DSP and those candies are the Red & White Peppermints (stinking adorable, aren't they?).
I had lots of fun making these cards and showing you lots of ways to use this bundle. But I've seen lots more creative ideas using this bundle too - what will you come up with? I'd love to hear what you make, or what was the most inspiring for you. Happy Autumn!
Karen
ThePowerOfACard@gmail.com
Etsy Shop: The Power of a Card
Shop my Store!
https://ThePowerOfACard.blogspot.com
Images Copyright Stampin’ Up!®
My current host code for October is: VE2WUZ4V.
Please use this for orders less than $150 and you’ll get a special treat from me.
For orders over $150, you qualify for host rewards from Stampin’ Up! (plus a treat from me!).










No comments:
Post a Comment