Tuesday, November 30, 2021

Keeping it Simple with Stamps, Ink and Paper

Sometimes I think back on my early days of stamping.  I didn't have all the supplies I have now, and yet, I still made beautiful cards.  A great place to start is with stamps, ink and paper, or SIP as many demonstrators call it.  I call it keeping it simple.  The stamp set I selected has both sentiments and designs.  I chose one that I could use for both masculine and feminine cards.  Next, I selected a color palette of five colors plus black.  The colors I chose are from one color family because I knew they would work well together, they would coordinate with the assortment of cardstock from that same family if I wanted to expand my product selection at a later point, and they are some of my favorites!

Gather your supplies:

  • Cardstock:  Thick Basic White 8-1/2" x 5-1/2"
  • Stamp Set: Artistically Inked
  • Ink:  Poppy Parade, Daffodil Delight, Granny Apple Green, Pacific Point, Gorgeous Grape and Memento Black
  • Adhesive and Tools
In my video, I show you how to make two great cards.  The first is a monochromatic thank you card which begins by folding your card base in half.  Using the "blob", which is an alcohol ink background design, stamp in the color of your choice all around the outside edge of the card front.  Stamp your sentiment in the same color in the center.  To finish it off, stamp the flap of the envelope (watch as I show you how to place a scrap paper under the flap so you can stamp all over the flap and not get ink anywhere else on the envelope.)  That's it!  Who wouldn't love getting this thank you card from you?


The second card uses more of the colors.  Stamp the large flower in Daffodil Delight and Poppy Parade.  Add the little dots in the center with black ink.  Stamp the leaves with Granny Apple Green and the birthday sentiment in Pacific Point.  Stamp one of the flowers on the envelope to match.  Voila!  Another fabulous card.  


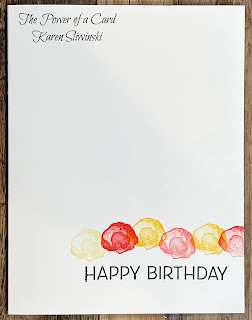
I stamped some more cards to help get your creative juices flowing - do you have a favorite?


As I mention in the video, a simple addition to the supplies I've used so far is an assortment pack from the same color family.  You get two sheets of each color, which is a low cost way to expand your card making options.  I added some paper layers, either with colored cardstock or basic white that I stamped on, but the cards are primarily flat.  


The last card does have dimension.  For this one, I stamped the flower and used my paper snips to fussy cut it out.  Next, I used some scraps of paper stacked together to place on the back side of the flower (in my example, I glued four rectangles together).  I then stamped leaves on my card front and added the flower on top.  This gives dimension without having to purchase extra supplies.  Plus, it's a great way to use up scraps of paper!


Keeping it simple doesn't mean boring!  Using the approach I show here is a wonderful way to get your feet wet with stamping.  Starting small is a smart idea.  And if you are like me, you'll be hooked!  Then you can join my team so you can fuel your passion with a discount!

Happy Simple Stamping,

Karen


ThePowerOfACard@gmail.com

Etsy Shop: The Power of a Card

https://karensliwinski.stampinup.net 

Images Copyright Stampin’ Up!®


Join my Facebook Group (The Power of a Cardmaker)https://www.facebook.com/groups/1042676296088278/?ref=share


My current host code for November is: YA4ER7GF

Please use this for orders less than $150 and you’ll get a special treat from me.

For orders over $150, you qualify for host rewards from Stampin’ Up! (plus a treat from me!).


Product List

Tuesday, November 16, 2021

Don't be Afraid of the Dark

When most people start making cards, they use a white card base and build from there.  While that is perfectly fine and lovely, it can also be a rut you get stuck in.  I use colored card stock for my base just as often as white and I love the look I get with that.  Today, I’m going to show you that dark colors as a card base can look awesome and often, richer and more attractive than a white or light colored card base.


I first made a lovely snowflake card using Rich Razzleberry and Blackberry Bliss on a white base.  This is what I teased you with at the beginning of my video.  Now, let’s go over to the dark side, and by that, I mean to say let’s make a card with a Rich Razzleberry base.

Gather your supplies:

  • Cardstock:  Rich Razzleberry 8-1/2" x 5-1/2"; Basic White 2-1/2" x 3-3/4", 3-1/2" x 4", and 4" x 5-1/4"; Blackberry Bliss 2-3/8" x 3-5/8"
  • Stamp Bundle: Merry Snowflakes
  • Ink:  Rich Razzleberry and Versamark
  • White Stampin' Emboss Powder
  • Clear Wink of Stella
  • Heat Tool
  • Adhesive and Tools

Fold your card base in half and crease with your bone folder.  Stamp the three sizes of snowflakes in Rich Razzleberry ink all around the outside of the card front.  You won’t need the middle since it is covered up with our sentiment.  


On the small piece of Blackberry Bliss paper, use versamark ink to stamp the season’s greeting sentiment.  (If you have an embossing buddy, go ahead and rub that over the paper first to help reduce stray bits of embossing powder sticking where you don’t want it.). Add white embossing powder and set with the heat tool.  Mat this piece with the slightly larger white layer.  Pop this up in the middle of the card with Dimensionals.


Cut out three snowflakes with the matching dies on the Stampin’ Cut & Emboss machine.  Use Wink of Stella to add sparkle before adhering them to the sentiment label.  I used Multipurpose glue to stick down just the portions that overlap the popped up layer.  The rest of the snowflake will stay elevated off your card without any Dimensionals to support them. 


For the inside of the card, you will need a white layer in which you can add your sentiment and any personal message.  I added a few stamped snowflakes with stamped off Rich Razzleberry to jazz it up.  I really love the dark version of this card!  I find the non traditional color is an unexpected twist and the richness of Rich Razzleberry is simply delicious.


In my next pair of cards, I used the Peaceful Place paper, which is stunning all by itself.  My two cards use one section of the paper that has silver flecked trees at the bottom graduating up to a silver speckled sky.  The light version is done on white with a Smoky Slate belly band to hold the gate fold card together.  I adorned the band with an iridescent Wonderful Snowflake and added a small, simple greeting from A Wish for Everything.  The dark version is nearly identical - I switched to a black card base and black belly band and stamped the greeting in black rather than gray ink.  Most people don’t think of using black as their base, but the dramatic effect it gives is perfect.


The last pair of cards have such a different vibe from each other.  The accordion folds have identical papers from Painted Christmas DSP and In-Color Shimmer Vellum - the only difference is the color of the card base and the color of the “interior” panel.  Which one do you prefer?  While I love the white one, I think the card made on the Evening Evergreen paper with the Soft Succulent interior panel is my favorite. 


One last thing before I set you off to the dark side - thanks go to my adult daughter Kristin who came up with the idea for this video and helped me design my third pair of cards.  She likes to give me a challenge - and I love taking the challenge and making it something that will help you improve your card making skills.  If there is ever something you want me to present in a video, let me know!


Karen


ThePowerOfACard@gmail.com

Etsy Shop: The Power of a Card

https://karensliwinski.stampinup.net 

Images Copyright Stampin’ Up!®


Join my Facebook Group (The Power of a Cardmaker)https://www.facebook.com/groups/1042676296088278/?ref=share


My current host code for November is: TAFAT62N

Please use this for orders less than $150 and you’ll get a special treat from me.

For orders over $150, you qualify for host rewards from Stampin’ Up! (plus a treat from me!).


Product List

Wednesday, November 3, 2021

Pretty Pillow Boxes and Gift Card Holders

When I first saw the Gingerbread and Peppermint Suite from the July - December mini catalog, I knew I had to get it!  Everything in this set of products is adorable and you've already seen some cards I've made with those products.  Today I am focusing on the Pretty Pillow Box Dies.  Making pillow boxes is super easy because the score lines are part of the die.  


In my video, I show several pillow boxes and describe the other components on the die set.  The pillow boxes can open from the sides (I found that adding a notch with a small circle die on the inside flap makes the pillow box easier to open), or from the front.  These pouches are quick and simple and they can be filled with little candies, earrings, money or chocolates.  As I show you, they can be made with any paper and for any theme.


One thing I found disappointing is that a gift card does not fit into the pillow box as is.  But don't you fret! I have a way to add two additional score lines and turn them into an adorable gift card holder!  For these, I do recommend printed paper because the curved score lines that we don't use are less visible with paper that has designs on it.

Gather your supplies:

  • Cardstock:  Painted Christmas DSP 41/2" x 6"; Evening Evergreen 1" x 5-1/4"; Basic White 2-1/4" x 2-1/4"
  • Stamp: Encircled in Warmth
  • Dies: Pretty Pillow Box and Layering Circles
  • Ink:  Real Red
  • Adhesive and Tools
Cut out the pillow box from the DSP.  I recommend using a pattern of paper that is not directional.  We have to add score lines on each side going from point to point of the curved flaps.  In the video, I show you how to do this with the personal trimmer, but you could just as easily do it with a ruler and a scoring tool.  

Start with the folds along the top and bottom.  I find it easier to gently crease the lighter weight DSP with my fingers, then go over the crease with the bone folder.  Next, crease the sides where you scored, folding the curved portion inward.  Glue the front flaps to the front inside - this makes it easier to slide the gift cards in and out.  When they are set, glue the back flap to the front panel (there will only be glue on the small flaps that we folded in.  Slide the gift card in and make sure the top flap folds over nicely - the extra thickness of the gift card may impact the fit.

To close the gift card holder, I chose to use a belly band.  Place the holder in the middle of the strip of Evening Evergreen paper and fold the bottom up - crease.  Now fold the top over to the front, making sure it is not too tight.  Before you glue the flaps together, slide the belly band off and on to make sure it's easy to move.

Stamp the sentiment onto the white square with Real Red ink and cut with the third smallest circle die.  Add this to the belly band with Mini Dimensionals.  That's all there is to it! 

Use the different ideas here for you as a starting point - the dies in this set make it easy to dress them up, or keep them simple and elegant.  Have fun!


Karen


ThePowerOfACard@gmail.com

Etsy Shop: The Power of a Card

https://karensliwinski.stampinup.net 

Images Copyright Stampin’ Up!®


Join my Facebook Group (The Power of a Cardmaker)https://www.facebook.com/groups/1042676296088278/?ref=share


My current host code for November is: TAFAT62N

Please use this for orders less than $150 and you’ll get a special treat from me.

For orders over $150, you qualify for host rewards from Stampin’ Up! (plus a treat from me!).


Product List

Super Sized Dotted Circles 3D Embossing Folder

Embossing folders have been around for many years, but each year, Stampin' Up! surprises me and comes out with new and unique folders!  ...