Tuesday, November 30, 2021

Keeping it Simple with Stamps, Ink and Paper

Sometimes I think back on my early days of stamping.  I didn't have all the supplies I have now, and yet, I still made beautiful cards.  A great place to start is with stamps, ink and paper, or SIP as many demonstrators call it.  I call it keeping it simple.  The stamp set I selected has both sentiments and designs.  I chose one that I could use for both masculine and feminine cards.  Next, I selected a color palette of five colors plus black.  The colors I chose are from one color family because I knew they would work well together, they would coordinate with the assortment of cardstock from that same family if I wanted to expand my product selection at a later point, and they are some of my favorites!

Gather your supplies:

  • Cardstock:  Thick Basic White 8-1/2" x 5-1/2"
  • Stamp Set: Artistically Inked
  • Ink:  Poppy Parade, Daffodil Delight, Granny Apple Green, Pacific Point, Gorgeous Grape and Memento Black
  • Adhesive and Tools
In my video, I show you how to make two great cards.  The first is a monochromatic thank you card which begins by folding your card base in half.  Using the "blob", which is an alcohol ink background design, stamp in the color of your choice all around the outside edge of the card front.  Stamp your sentiment in the same color in the center.  To finish it off, stamp the flap of the envelope (watch as I show you how to place a scrap paper under the flap so you can stamp all over the flap and not get ink anywhere else on the envelope.)  That's it!  Who wouldn't love getting this thank you card from you?


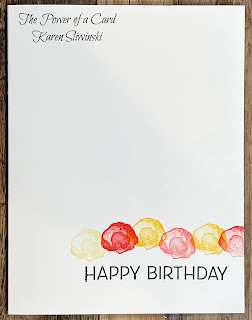
The second card uses more of the colors.  Stamp the large flower in Daffodil Delight and Poppy Parade.  Add the little dots in the center with black ink.  Stamp the leaves with Granny Apple Green and the birthday sentiment in Pacific Point.  Stamp one of the flowers on the envelope to match.  Voila!  Another fabulous card.  


I stamped some more cards to help get your creative juices flowing - do you have a favorite?


As I mention in the video, a simple addition to the supplies I've used so far is an assortment pack from the same color family.  You get two sheets of each color, which is a low cost way to expand your card making options.  I added some paper layers, either with colored cardstock or basic white that I stamped on, but the cards are primarily flat.  


The last card does have dimension.  For this one, I stamped the flower and used my paper snips to fussy cut it out.  Next, I used some scraps of paper stacked together to place on the back side of the flower (in my example, I glued four rectangles together).  I then stamped leaves on my card front and added the flower on top.  This gives dimension without having to purchase extra supplies.  Plus, it's a great way to use up scraps of paper!


Keeping it simple doesn't mean boring!  Using the approach I show here is a wonderful way to get your feet wet with stamping.  Starting small is a smart idea.  And if you are like me, you'll be hooked!  Then you can join my team so you can fuel your passion with a discount!

Happy Simple Stamping,

Karen


ThePowerOfACard@gmail.com

Etsy Shop: The Power of a Card

https://karensliwinski.stampinup.net 

Images Copyright Stampin’ Up!®


Join my Facebook Group (The Power of a Cardmaker)https://www.facebook.com/groups/1042676296088278/?ref=share


My current host code for November is: YA4ER7GF

Please use this for orders less than $150 and you’ll get a special treat from me.

For orders over $150, you qualify for host rewards from Stampin’ Up! (plus a treat from me!).


Product List

No comments:

Post a Comment

Die Cut Masks and Ink Spritzing Technique

I recently learned this technique from a Barb Mullikin, a demonstrator friend of mine and I thought I'd give it a try.  I had so much fu...