Everyday Arches is a bundle from the recent Online Exclusive release of products. While I have the bundle, I really wanted to focus on the dies in this video. There are ten of them, perfectly nesting from 1" x 2-1/4" up to 3-7/8" x 5-1/8". They are great for labels, background elements, windows, and more. In addition to showing fun layouts, I have a technique to use with ink blended backgrounds.
I also wanted to mention that in my samples, I am using quite a few Sale-a-Bration (SAB) items. SAB is happening now until the end of February. For every $60 in products you purchase, you are eligible to pick a free item (there are several larger items for selection when you reach $120). There is no limit to how many you get and there are stamp sets, paper packs, embellishments, a card kit, an embossing folder and even a bundle! In addition to the products you can earn, when you host an event and sales reach $300, you receive an additional $30 in host rewards. There is even an incentive for joining my team. Don't miss out on this great promotion - it only happens once a year.
Gather your supplies:
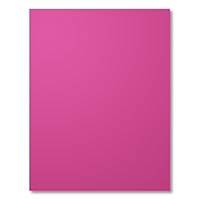
- Cardstock: Berry Burst 8-1/2" x 5-1/2"(scored at 4-1/4") and 4" x 5-1/4"; Basic White 4" x 3-1/2", 1/2" x 4", 1/2" x 2-1/2", 4" x 5-1/4"
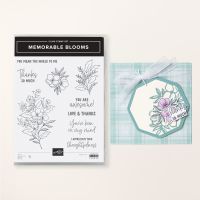
- Stamp: Memorable Blooms
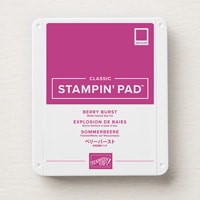
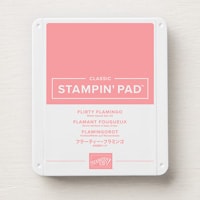
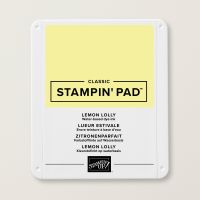
- Inks: Berry Burst, Flirty Flamingo, Lemon Lolly
- Die: Everyday Arches
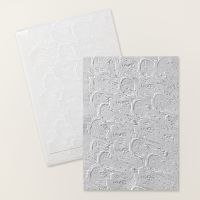
- Embossing Folder: Plaster Painting 3D
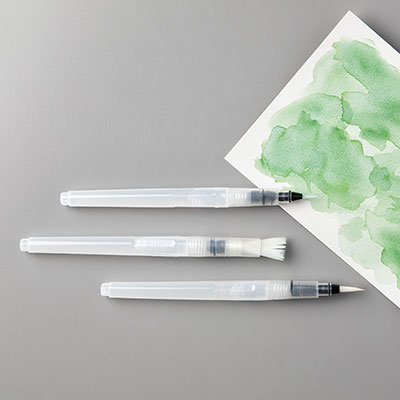
- Adhesive and Tools including Blending Brushes and Water Painter
The focal point of this card is the heart that is colored with ink blending. But it's not the usual heart - it is made with two arches. On the smaller rectangle of Basic White, start ink blending with Berry Burst. I like to go diagonally across the piece, so I started in the lower right corner. Next, blend in Flirty Flamingo and finish with Lemon Lolly. I was a little uncertain about Flirty Flamingo, but when I tested it, I was very happy to see how well it blends with the other two to give a soft blend of colors. Do the same blending of colors on the 1/2" x 4" strip of Basic White, which will be used for the inside of the card.
Grab your water painter, or a paint brush if you don't have one, and some water. Even though the water painter has water in the barrel, I find it's easier to control the amount of water if I dip it in some water. With the brush being fairly wet, add drops to your recently colored paper. You will get a variety of sizes and each one reacts with the ink on the paper to lighten and create a fun textured look. Allow this to fully dry before cutting it.
Cut out two arches using the 4th smallest one from your ink blended paper. While at the Stampin' Cut & Emboss machine, emboss the panel of Berry Burst with the Plaster Painting 3D embossing folder. (This is also new and is one of the very large ones - it has very deep texture and some interesting edges.)
Add the embossed panel to the card front, making sure to get adhesive very close to the edges to hold down this deeply embossed panel. Attach the two arches together to form the heart. Sometimes it is hard to pick which one is on to! Pop this up with Dimensionals onto your embossed panel. Stamp the sentiment onto the remaining piece of Basic White with Berry Burst and flag the ends. I still like to use my punch, but you can easily do a flag with Snips. Add two Dimensionals on the right side and a little glue on the left side to attach it to the card, overlapping the heart a little bit.
Add the ink blended strip to the panel of Basic White and stamp the inside sentiment with Berry Burst ink. Adhere this to the inside of your card. All that is left is to do some ink blending on the envelope. I keep the lighter weight plastic that covers a new photopolymer stamp set and these work great to mask off the edge of the envelope. Use the same three colors as earlier to add 3/4" - 1" border of color.
So when I first made my sample, I wondered if it was possible to weave in the ends of the arch and the answer is yes! While it is doable to weave them together using Basic White, I would recommend Whisper White instead. This is found in our scrapbooking line of products and is both brighter and more lightweight than our Basic White, which makes it easier to weave.
To cut them, first layer them like I did above but instead of gluing them together, make a light pencil line where they meet. You'll have to switch which one is on top so that both get marked. Then put one of them in the Trimmer, flat side up to the top guide. Center the arch over the cutting line; this is easy to do because you can see measurements on both sides. Add a piece of temporary tape to hold the piece in place. Then position your cutter at the pencil line and cut up to the top. The remaining cuts are just a little bit more than 3/8" - move the arch into position, tape and cut. Weaving the two pieces together is a bit fussy and takes some time, but the result is fantastic! Once everything is in place, add a little glue under the strips to hold them all together and not pop up. This is the sample heard made with Melon Mambo, Pumpkin Pie and Daffodil Delight.
My first sample is a card we made at December's card class and it does use the Everyday Arches stamp set. I started by using the Linked Together Decorative Masks to ink a subtle background to my card base. Then I cut the larger arch in Basic White and stamped the sentiment before adding the smaller arch made from the SAB Bloom Impressions DSP. I trimmed the white arch so both ended at the same place. A bow made from the Daffodil Delight Satin Ribbon was tied around the bottom of the arch before adding it to the card. I used With You in Mind stamp set for my birthday greeting on the inside.
This next card uses some paper that was given color refresh and returned as an Online offering - it is called Refreshed Beauty DSP. I love that this design uses a larger arch accompanied by two smaller arches in complementary patterns. A simple bow, sentiment (from Mixed Labels) and Adhesive-Backed Dappled Dots complete the front. I used Happy Birthday from With You in Mind and another little strip of DSP to finish the inside. Isn't it a great way to show off pretty patterned paper?
In the Mini Catalog is a gorgeous suite of products called Floral Delight. I used strips of the Floral & Gingham Vellum Specialty DSP and then one of the arches for my label. With You in Mind supplied the sentiment and I used the ribbon from the suite. This made a lovely thank you card so quickly!
Terrific Toadstools is a bundle in the Mini Catalog and Toadstool Gardens DSP is a SAB selection - as you might guess, they go coordinate wonderfully. I used the smallest arch to cut eight different paper patterns and arranged them on my card base. If you leave just a tiny space between them, you can fit all four across the card. I left about a 1/2" gap between them in the middle. Then I stamped my sentiment on a strip of Basic White and popped it up over the gap. I fussy cut the little toadstool and added it for a whimsical touch. More toadstools adorn the inside and envelope.
This next sample uses the Happy Hibiscus Bundle, an Online Exclusive released last November. I used the second largest arch to cut the beautiful ombre paper from Friends of the Ocean DSP, then matted it with Basic Black cut from the largest arch. Instead of placing it on my card base with the curved side up (which is what I would consider the "normal" orientation), I flipped it. After stamping, coloring and cutting out some flowers and leaves, I clustered them around the bottom of my arch. I added another ribbon bow (somehow, these arches seem to ask for bows!), and popped the entire piece up on the front of the card. More flowers adorn the inside and envelope.
This next card is just an arch! To do this, fold your card base in half the long way (4-1/4" x 11"). Then position the largest arch so that the cutting line is just beyond the fold. This will give you an arch that opens as your card. I used the next smaller size to cut an arch from Bloom Impressions DSP and added it to the front. The Iridescent Striped Trim, and With You in Mind stamp set helped me complete the card. I used Mixed Labels for the inside sentiment.
I think this card is my favorite! The Darling Dinos Bundle has three adorable dinosaurs and lots of fun things you can add to them (birthday hats, bow ties, glasses, etc.). I colored them in shades of purples and blues to coordinate with the paper from the SAB Toadstool Gardens DSP. After cutting out three arches side by side, I used Foam Adhesive Strips and a panel of Window Sheet to make a shaker card. The colors in the Itty Bitty Bokeh Mix are perfect for my dinos! I even added a few on the inside since they are flat. How very fun is this card??
My last card uses only a quarter sheet of Thick Basic White as the base. I added a panel of DSP from Bloom Impressions and tied a piece of White Frayed Grosgrain ribbon around it before adding it the base. I tied a smaller piece of ribbon on the right side - this adds a knot with less bulk. I then folded a piece of Basic White 2-3/8" x 7-1/4" in half and stamped the floral image from Memorable Blooms (another new Bundle from the Mini Catalog). I colored the flowers and leaves with watercolor pencils, because I didn't want to see the colors bleed through when I opened the flap if I had colored with Stampin' Blends. Then I cut out the arch, placing the cut line just beyond the fold line. After stamping my sentiment on the inside, I added it with Dimensionals to the card front.
Well, I hope that was a whirlwind of inspiration for you! I have had lots of fun playing with so many new stamps, dies, embellishments and papers! Please look at all the new offerings by visiting my online store (link below). We have something for everyone!
My current host code for January is: P77ZMPC6.
Please use this for orders less than $150 and you’ll get a special treat from me.
For orders over $150, you qualify for host rewards from Stampin’ Up! and free SAB products (plus a treat from me!).
Product List


![Modern Christmas Suite Collection (English) [ 166006 ]](https://assets1.tamsnetwork.com/images/EC042017NF/166006s.jpg "Modern Christmas Suite Collection (English) [ 166006 ]")
![Ornamental Christmas Bundle (English) [ 166001 ]](https://assets1.tamsnetwork.com/images/EC042017NF/166001s.jpg "Ornamental Christmas Bundle (English) [ 166001 ]")
![Words For The Season Cling Stamp Set (English) [ 165716 ]](https://assets1.tamsnetwork.com/images/EC042017NF/165716s.jpg "Words For The Season Cling Stamp Set (English) [ 165716 ]")
![Basic White 8 1/2" X 11" Thick Cardstock [ 159229 ]](https://assets1.tamsnetwork.com/images/EC042017NF/159229s.jpg "Basic White 8 1/2\" X 11\" Thick Cardstock [ 159229 ]")
![Basic White 8 1/2" X 11" Cardstock [ 166780 ]](https://assets1.tamsnetwork.com/images/EC042017NF/166780s.jpg "Basic White 8 1/2\" X 11\" Cardstock [ 166780 ]")
![Real Red 8-1/2" X 11" Cardstock [ 102482 ]](https://assets1.tamsnetwork.com/images/EC042017NF/102482s.jpg "Real Red 8-1/2\" X 11\" Cardstock [ 102482 ]")
![Gold Foil Sheets [ 132622 ]](https://assets1.tamsnetwork.com/images/EC042017NF/132622s.jpg "Gold Foil Sheets [ 132622 ]")
![Real Red Classic Stampin' Pad [ 147084 ]](https://assets1.tamsnetwork.com/images/EC042017NF/147084s.jpg "Real Red Classic Stampin' Pad [ 147084 ]")
![Versamark Pad [ 102283 ]](https://assets1.tamsnetwork.com/images/EC042017NF/102283s.jpg "Versamark Pad [ 102283 ]")
![Blending Brushes [ 153611 ]](https://assets1.tamsnetwork.com/images/EC042017NF/153611s.jpg "Blending Brushes [ 153611 ]")
![Metallics Wow! Embossing Powder [ 165678 ]](https://assets1.tamsnetwork.com/images/EC042017NF/165678s.jpg "Metallics Wow! Embossing Powder [ 165678 ]")
![Black & White & Gold Baker's Twine [ 166005 ]](https://assets1.tamsnetwork.com/images/EC042017NF/166005s.jpg "Black & White & Gold Baker's Twine [ 166005 ]")
![Gold Striped 3/8" (1 Cm) Mesh Ribbon [ 165599 ]](https://assets1.tamsnetwork.com/images/EC042017NF/165599s.jpg "Gold Striped 3/8\" (1 Cm) Mesh Ribbon [ 165599 ]")
![Multipurpose Liquid Glue [ 110755 ]](https://assets1.tamsnetwork.com/images/EC042017NF/110755s.jpg "Multipurpose Liquid Glue [ 110755 ]")
![Mini Glue Dots [ 103683 ]](https://assets1.tamsnetwork.com/images/EC042017NF/103683s.jpg "Mini Glue Dots [ 103683 ]")
![Stampin' Dimensionals [ 104430 ]](https://assets1.tamsnetwork.com/images/EC042017NF/104430s.jpg "Stampin' Dimensionals [ 104430 ]")
![Mini Stampin' Dimensionals [ 144108 ]](https://assets1.tamsnetwork.com/images/EC042017NF/144108s.jpg "Mini Stampin' Dimensionals [ 144108 ]")
![Paper Trimmer [ 152392 ]](https://assets1.tamsnetwork.com/images/EC042017NF/152392s.jpg "Paper Trimmer [ 152392 ]")
![Stampin' Cut & Emboss Machine [ 149653 ]](https://assets1.tamsnetwork.com/images/EC042017NF/149653s.jpg "Stampin' Cut & Emboss Machine [ 149653 ]")