Showing posts with label Artistically Inked. Show all posts

Wednesday, April 20, 2022

See Through Cards

Today's card has a window where you can see right through the entire card!  This is a fun way to really make a Wow card with not a lot of effort.  By cutting the "window" with the shadow die of a word, you'll create this amazingly beautiful card.  I want to give a shout out to Jennifer McQuire, who gave me the inspiration to demonstrate this wonderful technique. Watch my video to see just how simple this is to do.   

Gather your supplies:

  • Cardstock:  Old Olive 8-1/2" x 5-1/2"; Basic White 4" x 5-1/4", 4" x 3-1/2"; Expressions in Ink Specialty DSP 4" x 5-1/4"; Gold Foil 1-1/2" x 3-1/2"; and Window Sheets (2) 1-1/2" x 3-3/4"
  • Stamp Set: Rainbow of Happiness (plus Artistically Inked for the envelope)
  • Ink:  Old Olive (Pale Papaya for envelope)
  • Amazing Thanks Dies
  • Adhesive and Tools
While this card may take a little time to cut and assemble the parts, there is little stamping and the stunning DSP makes the perfect backdrop to our word of Thanks.  Start by folding the card base and burnishing the fold.  Position the DSP layer on the card front but do not glue it down.  Instead, hold it in position with low tack tape, a post it or washi tape.  Lay the shadow die on top, about one third of the way from the top.  Again, hold this in place with low tack tape.  Open up the card and run it through the Stampin' Cut & Emboss machine.  Because the DSP is a thinner paper than the cardstock, it should cut through both layers in one pass.

Remove the shadow pieces and set aside for another project.  Close the card and position the die right back in the opening - it will fit perfectly, just like a puzzle piece.  Run this through again to cut out the back of the card.  There is one remaining layer that needs to be cut.  Position the white panel on the inside of the card and tack in place.  Close the card and once again, place the die in the opening and run it through again.  This should cut out the white layer, but in case you don't get quite the clean cut you need (like it happened in my video), just take the white layer off, position the die (it will lock in place) and run it through by itself.

Time to add the window sheets.  Apply tiny amounts of glue around the cut out word bubble on the back of the DSP.  Place a window sheet over the opening, making sure that the entire opening is covered with the acetate.  Now you can adhere this DSP panel to the front of the card.  It will line up perfectly and your window opening  on the front.  Repeat the process with the white inside layer.  

From the piece of Gold Foil, cut out the thin Thanks word die.  This is optional (but steps up your card a notch or two) - cut out three additional Thanks from the other white piece.  Using tiny amounts of glue, stack the three white layers of Thanks together.  The liquid clue will allow you to move them around to align them perfectly.  As you add more layers, it holds its shape better and almost looks like chipboard.  Add the foil Thanks to the top, then position this on the inside window in the middle of the Thanks outline.  I would also recommend cutting one additional Thanks (skinny version) to adhere to the back of the card to hide the glue visible on the window sheet.  You could even cut it from one of the shadow thanks you set aside.

To finish off the card, I stamped the words "you make me happy" just below the window in Old Olive Ink.  On my sample, I added a Brushed Brass Butterfly, but forgot to add it during the video.  Again, it is just a little touch, but it elevates the level of craftsmanship of your card.  I decorated my envelope with the large flower from Artistically Inked to coordinate.  


My next three cards all feature products from the soon-to-be-released annual catalog.  I hope you don't mind a sneak peak!!  My first one uses another word die and its shadow.  I used the Waves of the Ocean DSP (LOVE that paper) and the new Sending Smiles bundle.  My card base is Calypso Coral and I just adore this card!


The next one uses labels instead of word dies.  I used the All That dies, a Basic Black card base and Perfectly Pencilled DSP.  As you can see, the window is larger and a little more impactful as a window.  The sentiments and flower are from the Nature's Prints stamp set.


My last card is so lovely - I am thrilled at how this one came out!  The window is made with our new Stylish Shapes Dies (I am so excited for these stitched shapes - they are a must have!).  The Card base is Mango Melody and the DSP is called Tea Boutique.  The print I selected features one of our new In-Colors, Sweet Sorbet.  I then used the Hues of Happiness bundle to stamp and cut out a flower for the middle of the circle.  I colored it with blends, stacked a few more under it and positioned it in the middle of the Window Sheet.  For the sentiment strips, I used the Art Gallery stamp set/Floral Gallery dies.  This time, I positioned a label on both windows.  To make sure they line up properly, adhere the inside one first, then close the card and add the one to the top.


I hope you enjoyed both this technique and a preview of some exciting new products and colors coming out with our new annual catalog.  It will be released on May 3rd and I know you'll be seeing a lot more from it in my upcoming videos!


Karen


ThePowerOfACard@gmail.com

Etsy Shop: The Power of a Card

https://karensliwinski.stampinup.net 

https://ThePowerOfACard.blogspot.com

Images Copyright Stampin’ Up!®


Join my Facebook Group (The Power of a Cardmaker):  https://www.facebook.com/groups/1042676296088278/?ref=share


My current host code for March is: FX4R74BK

Please use this for orders less than $150 and you’ll get a special treat from me.

For orders over $150, you qualify for host rewards from Stampin’ Up! (plus a treat from me!).


Product List

Tuesday, December 14, 2021

Quick and Easy with Designer Series Paper and Punches

As you know, I recently moved and the process of moving and unpacking has taken a lot of my time.  That means that I've not had the time I normally have to make cards.  I wanted to have my Christmas cards all in the mail, but I'm still making them.  That gave me the idea for this video - I may not be the only person who needs some quick and easy cards!

I am pairing two great products - our beautiful Designer Series Paper (DSP) and punches.  We have quite a few punches that work great for sentiments (look at the annual catalog starting on page 147).  I'm guessing that many of you have some of the retired circle punches - these work really well too.  The two stamp sets I used for most of my examples are Inspired Thoughts and Best Year.  I love these two sets because of the variety of sayings and the fact that you can use them on the front and inside of your card - or innies and outies.  If you don't have them, I would highly recommend them as a staple in your stamp room.

Although I do show some variations, the two cards I feature in the video use essentially the same supplies - a card base, a piece of 4" x 6" DSP, paper for the sentiment and a punch.  The DSP for the first card is meant to be cut into six panels, 4" wide - just think - you can make six cards in just a half hour!

Gather your supplies:

  • Cardstock:  Granny Apple Green 8-1/2" x 5-1/2"; Basic White 4" x 5-1/4" and 1-1/4" x 4"; Expressions in Ink DSP 4" x 6"; Evening Evergreen 8-1/2" x 5-1/2" and 3/8" x 4"; Basic White 4" x 5-1/4" and 1-1/2" x 4"; Painted Christmas DSP 4" x 6"
  • Stamp Sets: Inspired Thoughts and Best Year
  • Ink:  Shaded Spruce and Evening Evergreen
  • Punches: Double Oval and Label me Fancy
  • Adhesive and Tools

There are four designs in the Expressions in Ink pack of paper that can be cut in half and then into 4" widths, yielding six panels.  Choose your pattern and cut as I demonstrate.  You will then need to trim the panel to be 4" x 5-1/4" - keep the 3/4" strip you cut off as we can often use it on the inside of the card.  Fold your card base in half and crease with the bone folder.  Adhere the DSP panel to the front.

On one end of your white strip, stamp the sentiment with Shaded Spruce ink.  Use the oval punch to cut out your sentiment, then pop this up on the front using Stampin' Dimensionals.  Depending on the design of your DSP, you may be able to use the 3/4" strip to decorate the white interior panel.


It was just a few years ago that Stampin' Up! started designing some of their DSP to use in this fashion.  These next few cards feature paper from The Beauty of the Earth and Peaceful Place. For this one, I used the Double Oval and added some twine.  For the sentiment on the Christmas card, I embossed the sentiment with Silver on Poppy Parade cardstock and then punched it out with the Everyday Punch.


So far, I've been focusing on paper that was designed to cut in half and then into panels for quick card making.  This layout is not limited to that paper!  I find it is great with large patterns as you can see with this card that used Bloom Where You're Planted DSP.  I added a little ribbon and used the Label me Lovely punch.


Now for a variation of this layout - we will still use a piece of DSP that is 4" x 6", but this time, we will cut it into three pieces.  The first cut will be to trim 3/4" off the bottom, and then cut the remaining piece (that measures 4" x 5-1/4") into two pieces.  These don't have to be the same size - it will depend on the patterns in your paper.  Additionally, an extra strip of contrasting cardstock will be used to cover the seam.


My sample was made on Basic White, but for the video, I made the same version, just on an Evening Evergreen base.  I cut the Painted Christmas paper and adhered it to the card base.  A small strip of Evening Evergreen covers the seam and gives a polished look.  I stamped my sentiment on the small strip of Basic White,  cut it out with the Label me Fancy punch and popped it up with Dimensionals.  The final touch is a white panel on the inside with the small strip of DSP as decoration.


This sample uses the Rectangular Postage punch and the In the Wild DSP.  One thing I like to consider is that the pattern on the back side may not be exactly what you want on your card.  In this case, look at other patterns and you may find that you can cut two different papers and mix and match the pairings for two cards!


A small variation would be to cut a 3-3/4" x 5" piece of DSP, cut this into two pieces and place them on a 4" x 5-1/4" panel of colored cardstock.  Here are a few samples of this variation.  This one uses paper that was part of the Sale-a-bration selections, which many of you may have.  It was just so cute, I had to use it!  The punch is Label me Fancy.


My last card is a sneak peak of some products from the upcoming mini catalog - Sweet Talk DSP and Sweet Conversations stamp set.  The punch is the Heart Punch Pack.  Just about every paper in this pack can be used for this layout - I love them!

I hope you like these quick and easy cards.  Every time I prepare for a new video, I tell myself that I don't have to make so many samples, but then I can't help myself!  It is easy to keep making cards with these two layouts, so why not?

Karen


ThePowerOfACard@gmail.com

Etsy Shop: The Power of a Card

https://karensliwinski.stampinup.net 

Images Copyright Stampin’ Up!®


Join my Facebook Group (The Power of a Cardmaker):  https://www.facebook.com/groups/1042676296088278/?ref=share


My current host code for December is: YA4ER7GF

Please use this for orders less than $150 and you’ll get a special treat from me.

For orders over $150, you qualify for host rewards from Stampin’ Up! (plus a treat from me!).


Product List
Inspired Thoughts Cling Stamp Set
$19.00
Best Year Cling Stamp Set (English)
$20.00
Granny Apple Green 8-1/2" X 11" Cardstock
$8.75
Basic White 8 1/2" X 11" Cardstock
$9.75
Expressions In Ink 12" X 12" (30.5 X 30.5 Cm) Specialty Designer Series Paper
$15.00
Shaded Spruce Classic Stampin' Pad
$7.50
Double Oval Punch
$18.00
Evening Evergreen 8 1/2" X 11" Cardstock
$8.75
Painted Christmas 12" X 12" (30.5 X 30.5 Cm) Designer Series Paper
$11.50
Evening Evergreen Classic Stampin' Pad
$7.50
Label Me Fancy Punch
$18.00
Multipurpose Liquid Glue
$4.00
Stampin' Dimensionals
$4.00
Bone Folder
$7.00
Paper Trimmer
$25.00

Tuesday, November 30, 2021

Keeping it Simple with Stamps, Ink and Paper

Sometimes I think back on my early days of stamping.  I didn't have all the supplies I have now, and yet, I still made beautiful cards.  A great place to start is with stamps, ink and paper, or SIP as many demonstrators call it.  I call it keeping it simple.  The stamp set I selected has both sentiments and designs.  I chose one that I could use for both masculine and feminine cards.  Next, I selected a color palette of five colors plus black.  The colors I chose are from one color family because I knew they would work well together, they would coordinate with the assortment of cardstock from that same family if I wanted to expand my product selection at a later point, and they are some of my favorites!

Gather your supplies:

  • Cardstock:  Thick Basic White 8-1/2" x 5-1/2"
  • Stamp Set: Artistically Inked
  • Ink:  Poppy Parade, Daffodil Delight, Granny Apple Green, Pacific Point, Gorgeous Grape and Memento Black
  • Adhesive and Tools
In my video, I show you how to make two great cards.  The first is a monochromatic thank you card which begins by folding your card base in half.  Using the "blob", which is an alcohol ink background design, stamp in the color of your choice all around the outside edge of the card front.  Stamp your sentiment in the same color in the center.  To finish it off, stamp the flap of the envelope (watch as I show you how to place a scrap paper under the flap so you can stamp all over the flap and not get ink anywhere else on the envelope.)  That's it!  Who wouldn't love getting this thank you card from you?


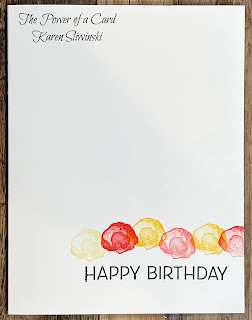
The second card uses more of the colors.  Stamp the large flower in Daffodil Delight and Poppy Parade.  Add the little dots in the center with black ink.  Stamp the leaves with Granny Apple Green and the birthday sentiment in Pacific Point.  Stamp one of the flowers on the envelope to match.  Voila!  Another fabulous card.  


I stamped some more cards to help get your creative juices flowing - do you have a favorite?


As I mention in the video, a simple addition to the supplies I've used so far is an assortment pack from the same color family.  You get two sheets of each color, which is a low cost way to expand your card making options.  I added some paper layers, either with colored cardstock or basic white that I stamped on, but the cards are primarily flat.  


The last card does have dimension.  For this one, I stamped the flower and used my paper snips to fussy cut it out.  Next, I used some scraps of paper stacked together to place on the back side of the flower (in my example, I glued four rectangles together).  I then stamped leaves on my card front and added the flower on top.  This gives dimension without having to purchase extra supplies.  Plus, it's a great way to use up scraps of paper!


Keeping it simple doesn't mean boring!  Using the approach I show here is a wonderful way to get your feet wet with stamping.  Starting small is a smart idea.  And if you are like me, you'll be hooked!  Then you can join my team so you can fuel your passion with a discount!

Happy Simple Stamping,

Karen


ThePowerOfACard@gmail.com

Etsy Shop: The Power of a Card

https://karensliwinski.stampinup.net 

Images Copyright Stampin’ Up!®


Join my Facebook Group (The Power of a Cardmaker):  https://www.facebook.com/groups/1042676296088278/?ref=share


My current host code for November is: YA4ER7GF

Please use this for orders less than $150 and you’ll get a special treat from me.

For orders over $150, you qualify for host rewards from Stampin’ Up! (plus a treat from me!).


Product List

Christmas Cards in Unexpected Colorways

I love Christmas.  I love making Christmas cards.  I love decorating for Christmas.  And I loved making this video for you!  (Please note, ...