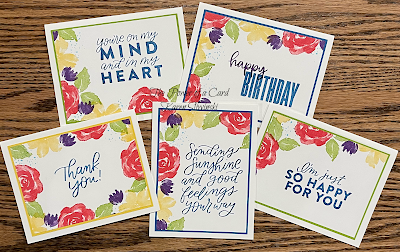
Tuesday, November 29, 2022

Five at Once SIP (Stamps, Ink, Paper) Cards

Sometimes we forget that we can create beautiful cards with only Stamps, Ink and Paper (SIP).  My upline, Dena Rekow, showed me a way to make five cards at once and I thought I'd share this technique with you!  It is a great way to make a set of cards to give as a gift, or to make lots of cards, perhaps for Christmas, quickly.

There are two ways you can prepare the full sheet of Very Vanilla for stamping - one is by using a ruler and making light pencil lines as shown in my diagram.  You'll want a good eraser to remove them when you're done stamping.  The other way is to cut the paper right from the beginning and use a little bit of tape to hold them together for stamping.  I use this second method in my video, but feel free to do whichever method is easier or better for you.  In either method, you'll end up with five card fronts that are 4-7/8" x 3-5/8" and just two small leftover scraps.


When choosing the images to stamp, it is usually recommended to have stamps in a variety of sizes.  Bold images, like the leaves I use in the video, work very well.  I also recommend large sized sentiments as they will fill in the blank space on each card nicely.  You can use line art stamps (as you'll see in my examples) - try to find ones that aren't directional in their design.


Gather your supplies:

  • Cardstock: Thick Very Vanilla 8-1/2" x 5-1/2"; Very Vanilla 8-1/2" x 11"; (5) Shaded Spruce 3-3/4" x 5"
  • Stamps:  Forever Fern, Biggest Wish, Good Feelings
  • Ink:  Granny Apple Green, Parakeet Party, Garden Green, Shaded Spruce
  • Adhesive and Tools, including Scotch Tape and/or Pencil

Prepare the full sized sheet of Very Vanilla - either by cutting and taping back together like I did, or by drawing light pencil lines.  I recommend starting with the largest stamp image and Granny Apple Green - stamp this along the cut/pencil lines in a variety of positions.  Next, switch to Parakeet Party and another leaf, adding more foliage along the cut/pencil lines.  Fill up the space with more leaves in Garden Green and Shaded Spruce.  Your leaves will overlap - that's why it is important of use colors that look good next to or on top of each other.  For one card front, I also stamped on the left outside edge.  I preferred to have all four sides stamped rather than just three.  The remaining pieces all have two stamped edges.  

When you have all the leaves stamped, cut the cardstock into the five pieces, or remove the tape holding them together.  Add your sentiments in Shaded Spruce.  This is where I loved using my sets that had big and bold sayings.  If desired, you can spritz with a Stampin' Write Marker.  I didn't do that when I made my first samples, but did for the ones in the video - I think it adds a nice touch.  The last step is to mat these pieces with Shaded Spruce and adhere to your card base of Thick Very Vanilla.  If you truly want these cards to be SIP, just add them with your favorite adhesive.  I like to use Dimensionals, so I added them to some of the cards.  Which version do you like better - spritzed like above, or plain as shown on the right?

When Dena demonstrated this technique, she used the Christmas Season stamp set - here is my version of what she did and my first set of five SIP cards.  I used the Brightest Glow set for the sentiment.  It was beneficial to make something nearly identical to hers to help me get the feel for this technique and I encourage you to use any of my samples to get you started too.   

The next version I made features Watercolor Shapes.  I used Fresh Freesia, Gorgeous Grape, Highland Heather, Polished Pink and Melon Mambo to make these dynamic geometric cards.  I love how fun they turned out and think this could be done in so many color combinations!


Next, I used True Beauty and bright, happy colors (Daffodil Delight, Pacific Point, Granny Apple Green, Gorgeous Grape and Sweet Sorbet.  I borrowed the tiny dots from the Forever Fern stamp set to add a filler in Tahitian Tide.  I did change up the mat colors to mix it up a bit.

My last set of cards has a whole different vibe because I used line art stamps and stamped them in black rather than colors.  I didn't know if I would like this, but I loved it!  You have to have images that are not directional and sometimes that is harder with line art sets.  I love that it was so fast!  No changing colors and actually, I only had to use three stamps from the Happiness Abounds stamp set to make these.  To get my colors, I stamped the sentiment in bright colors and put them on the same colored card base.  All of them were matted in Basic Black with really makes them pop.


Which is your favorite?  I think it is either the shapes or line art flowers in black for me.  It might seem difficult to get your stamps just right - but it really isn't!  Remember that you can add more stamping after you've cut them apart and each one is unique!  You'll end up with five beautiful cards at once using just stamp, ink and paper!

Karen


ThePowerOfACard@gmail.com

Etsy Shop: The Power of a Card

https://karensliwinski.stampinup.net 

https://ThePowerOfACard.blogspot.com

Images Copyright Stampin’ Up!®


Join my Facebook Group (The Power of a Cardmaker)https://www.facebook.com/groups/1042676296088278/?ref=share


My current host code for December is: ZDXDKWED

Please use this for orders less than $150 and you’ll get a special treat from me.

For orders over $150, you qualify for host rewards from Stampin’ Up! (plus a treat from me!).

Product List

Tuesday, November 15, 2022

Designer Series Paper Card Base

Our Designer Series Paper (DSP) is often so lovely, it is hard to decide which side to use when making cards!  Well, this video shows you how to use the DSP as your card base which allows you to showcase both sides at once.  I think you are going to love it!

Before I get started, I just wanted to share the happy news that my daughter and her husband welcomed a baby boy into our family on November 7th.  I was privileged to be part of the delivery of baby William Louis and it's been just a little exciting around our homes since then!  As a result, this blog may be a little shorter than usual as I seem to spending a lot of time with my new grandson!  Imagine that!

Gather your supplies:

  • Cardstock: Celebrate Everything DSP 4" x 12" plus scraps; Basic White 3-3/4" x 5-1/4", 3" x 1-1/2"; Basic Black 4" x 1-1/8", 2" x 3-3/4"
  • Stamp:  Inspired Thoughts
  • Die: Seasonal Labels
  • Ink:  Jet Black Stazon 
  • Ribbon:  1/4" Black and White Gingham 8", Baker's Twine Essentials (Black) 10"
  • Embellishments: Rhinestone Basic Jewels
  • Adhesive and Tools 


Normally, the cards I make are 4-1/4" by 5-1/5", but this one is just a little smaller at only 4" wide.  The reason for this is that you can get three cards out of a sheet of 12" DSP rather than only two.  When cutting your paper, pay attention if you have a directional pattern.  In my example, I needed my trees to be standing vertical for my card. Don't forget to look at both sides before cutting to be certain that they don't both have directional patterns!

After deciding which side of the DSP you want on the front of the card, score at 1" from the right side - this will fold back and decorate the front of your card.  You could score at 5-1/2" too, but I just held my edges together (after folding back the 1" flap) and creased it with my bone folder.  Add the 1-1/8" x 4" piece of black under the flap and glue in place.

The rest of the card is super easy - cut your labels and stamp the sentiment on the right side of the white label.  From a scrap of the DSP, fussy cut a few trees to decorate the label (and top them with a few tiny rhinestones). Cut the gingham ribbon in half and tie a bow around the middle with the twine.  Adhere this to the flap and trim the ends.  The white panel for the inside gives your card the stability it needs (since DSP is far lighter in weight than our cardstock).  To finish off the inside, I added a sentiment and added another tree in the corner.  One more tree on the corner of the envelope is the final touch - just make sure to add glue all over the piece.

There are so many ways you can change up this layout as you can see from my examples.  You can sandwich a ribbon under the flap before gluing it down.  How about changing the width of the coordinating color that peaks out or changing it altogether by using a border die? Try having the bolder side of the paper on the inside of the card.  Once you get started making cards with this design, you won't want to stop.  It's a fabulous way to showcase the paper and a great way to use up your stash!


I mentioned some of the die sets that have borders in the video, but in case you missed them, here is that list:  Gingerbread House, Blossoming Happiness, Basic Borders, Deckled Rectangles, Eden, Fancy Frames, Delicate Edges, Palms, Penned Flowers, Scalloped Contours, and Stitched with Whimsy.


My final one is just so lovely with the glimmer paper cut with the Basic Border dies.  The Boughs of Holly paper is some of my favorite Christmas paper this year!  Please share your cards on my Facebook Post for this video!


Karen


ThePowerOfACard@gmail.com

Etsy Shop: The Power of a Card

https://karensliwinski.stampinup.net 

https://ThePowerOfACard.blogspot.com

Images Copyright Stampin’ Up!®


Join my Facebook Group (The Power of a Cardmaker)https://www.facebook.com/groups/1042676296088278/?ref=share


My current host code for November is: VTZWFTBS

Please use this for orders less than $150 and you’ll get a special treat from me.

For orders over $150, you qualify for host rewards from Stampin’ Up! (plus a treat from me!).


Product List

Tuesday, November 1, 2022

Introducing the Fitting Florets Collection

I love it when we have a sneak peak at something from the mini catalog that will be released in January!  The Fitting Florets Collection has two stamp sets, coordinating dies, DSP, and an embellishment.  The Framed Florets Bundle will be in the new catalog, but the Framed & Festive stamp set, Fitting Florets 12" x 12" DSP and the Gold Adhesive-Backed Swirls are only available while supplies last.  All of these are available to purchase from my on-line store beginning November 1st - just click on the links below.

The card I chose to demonstrate is made with the scrappy strips technique.  While I've shown this before, it's been a little while - here is the link to Scrappy Strips - A Quilter's Perspective.  (Side note - when I went to add the link, I didn't realize just how old this video was - it was only my fifth video made, almost 2-1/2 years ago!!)  The papers in the DSP pack are perfect for this technique and it's a great way to show you all of them!  You'll need just a 4" square of each of them and this will be plenty to make at least four or five cards.  After I make this scrappy strip card, I present a LOT of examples in my video to showcase the collection, including a few made with other papers and color schemes to get you motivated!

Gather your supplies:

  • Cardstock: Polished Pink 5-1/2" x 8-1/2"; Basic White 4" x 5-1/4", 3-1/2" x 4-3/4", 3" x 3-3/4"; Balmy Blue 3-11/16" x 4-15/16" (just shy of 3-3/4" x 5"), 4" squares of Fitting Florets DSP (I used all six papers)
  • Stamp Bundle:  Framed Florets
  • Ink:  Polished Pink, Balmy Blue, Soft Succulent
  • Ribbon:  Double Stitched Balmy Blue 6"
  • Adhesive and Tools
Start cutting the DSP into strips that are wider at one end than the other.  Generally speaking, they are about 1/4" wide on the narrow end and 1/2" (ish) on the wide end.  Do not measure - just cut!  After you have cut at least two to three strips from each of them, make sure you turn some of them over as there are twelve different papers to use.  On the 3-1/2" x 4-3/4" piece of white, adhere the first strip, aligning the it with the edge of the white.  The strips are a little longer than needed - this makes it easier to position and will be trimmed to the exact size needed at the end. When you add the second strip, leave a very small gap (about 1/16"), flipping it (usually) so the wider end is opposite of how the first strip was placed.  Continue adding strips, mixing up the patterns and colors until you have reached the end of the white.  Then using your snips or trimmer, cut off any excess DSP.  

Mat this scrappy strips piece with the Balmy Blue layer.  Adhere the ribbon horizontally on top of this and add this to the front of your card with Dimensionals.  To finish the card front, cut out the smallest oval from Basic White.  We only need the interior oval - save the outside one for another card.  Stamp the sentiment in Balmy Blue toward the left side and stamp the flowers in stamped-off Polished Pink.  Add more Dimensionals and adhere over the ribbon.  I stamped another greeting on the inside panel and added a few leaves with stamped-off Soft Succulent.  Stamp the flowers in Polished Pink on the envelope flap to finish this beautiful birthday card!


I love when the dies not only cut out the stamped images from the stamp set, but designs from the DSP too!  For this card, I cut out two floral clusters in their entirety, plus a couple that were at the edge.  I love being able to place them on the edge of my panel - it allows you to fill up the space and not waste any of the DSP!  The gold swirls are the perfect touch to embellish this lovely card and because they are low profile, they are easy to mail.


On my next card, I used the same oval as the one I cut for my first card, but this time, I'm using both parts.  I use blending brushes to lighly color the outer oval with Soft Succulent.  The leaves stamped on the smaller oval are also stamped on the card base in two of the corners with Evening Evergreen ink.  It's a subtle touch that adds an extra bit of character to the card.  The Gold Foil die cut leaves coordinate well with the swirls and the Evening Evergreen bow completes the look.


This Thank You card is super simple!  I cut the oval ring of hearts from a white panel and then used my Blends to color the remaining hearts to match my card base.  I left them right on my cutting plate and this made it super easy to color!  After stamping my sentiment on the inner oval from the large oval frame, I popped it up in the center and added a scattering of those colored hearts (and I added more on the inside panel next to my sentiment too!).  I love both the simplicity and ease of making this card.


Next, I feature more of the DSP plus some of the other stamps and dies.  The fun thing about this design is that the DSP is the card base and not colored cardstock!  I loved this layout so much, I decided that this will be my next video, scheduled to come out in the middle of November - stay tuned!


The Framed & Festive stamp set has some great Christmas sentiments and was the inspiration for this beautiful slimline card!  To make the ornaments, I chose the Layering Circles Dies in three different sizes to fit the three sentiments which were stamped in Evening Evergreen.  I used my Blending Brushes to lightly add Soft Succulent to the outside edges.  If desired, add some Wink of Stella to make them shine just a little!  The tea bag dies from Tea Cup Dies cut from some Glimmer Paper made the top of the ornament.  I used a Stampin' Write Marker to draw the strings, popped up the ornaments with Dimensionals and finished with a knot of Evening Evergreen ribbon.  The slimline envelopes are perfect for this card because they come in three colors, including Soft Succulent and White!!


Here's another simple card that makes a big impact.  Glimmer paper is the backdrop to the beautiful framed sentiment.  The photo does not capture the sparkle of this card very well, but it does show in the video.  I layered four or five ovals to make it look like chipboard and have dimension.  The Red Rhinestones around the sentiment are all that you need for this beauty!  I used the Brightest Glow stamp set for my interior sentiment and envelope - it's another great one to add to your collection when making holiday cards.


This sample uses a selection of soft pastel colors for the floral sprig on top of the oval.  I stamped the flowers and sentiment in Basic Gray ink for a softer look.  The Iridescent Pearls are great with this card and coordinate with the subtle polka dots in the DSP.  Just think of the variety of looks you can get by just changing up the color scheme!

My last card (I told you I had a lot!), is similar to the sparkly one, but in a different orientation and even easier!  I selected a paper from the Host DSP in the July - December mini catalog and only did one layer of the outer oval and popped up the inner oval.  I also used a snowflake from the Celebration Tag Dies.  There is just something about this card I adore - the Polished Pink color makes an unusual, but fun, Christmas card!

I hope you have loved this introduction to the Fitting Florets Collection.  I have links to the entire collection below (plus some of the individual items) and encourage you to get them while you can!

Karen


ThePowerOfACard@gmail.com

Etsy Shop: The Power of a Card

https://karensliwinski.stampinup.net 

https://ThePowerOfACard.blogspot.com

Images Copyright Stampin’ Up!®


Join my Facebook Group (The Power of a Cardmaker)https://www.facebook.com/groups/1042676296088278/?ref=share


My current host code for November is: VTZWFTBS

Please use this for orders less than $150 and you’ll get a special treat from me.

For orders over $150, you qualify for host rewards from Stampin’ Up! (plus a treat from me!).


Product List

Super Sized Dotted Circles 3D Embossing Folder

Embossing folders have been around for many years, but each year, Stampin' Up! surprises me and comes out with new and unique folders!  ...