This technique is another old one that I haven't done in a while! I saw a video from Gina K Designs and it reminded me about it. When you do this, you won't actually be adding texture to your paper like you would with an embossing folder. You get the textured look when you do ink blending after doing the technique. I show you how to do this in the video (it's simple!), but you will need a few non-card making supplies. I also show a card that uses a variation of the technique using an embossing folder.
Special note - if you read this blog before I release my video on June 24th, you won't get to see it yet - please come back and watch!
Let's start with just the process. In addition to the cardstock for your project, you will need wax paper, a dry iron, an ironing board (or other surface that can take the heat) and a couple sheets of copy paper. It is important to note that parchment paper will not work - you need the wax coating to make the textured appearance. I like to start with pieces that are larger than I need for my card. Let's go with two 4-1/4" x 5-1/2" (quarter size sheets) of Basic White and the same size piece of wax paper.
Crumple the wax paper into a ball, then flatten it back out and sandwich it between the two pieces of white cardstock. Place this sandwich between layers of copy paper and press with the iron which is set on the highest setting. Do not use steam! In fact, I recommend emptying the iron before using it. After a few minutes, remove the copy paper and open the sandwich. It is important to remember which side of the cardstock touched the wax paper. I like to flip the sandwich open so the sides facing up are the ones that touched and need ink blending. Keep the wax paper - I show you how you can use it for another purpose!
Don't forget to check out my card samples - I think after seeing them, you will have plenty of ideas of how to use this technique in your craft room. I even have one where I embossed the wax paper instead of crumpling it up and the result is quite beautiful!
Gather your supplies:
- Cardstock: Azure Afternoon 8-1/2" x 5-1/2"; Basic White (2) 4/1/4" x 5-1/2", 4" x 5-1/4", 2-1/4" x 3-3/4", 1/2" x 1-1/2"
- Stamp: Wild Bunch (June 2026 Product of the Month)
- Die: Stylish Shapes
- Inks: Balmy Blue, Azure Afternoon, Blueberry Bushel, Memento Black
- Blends: Basic Black, Golden Glow
- Adhesive and Tools including blending brushes, wax paper and an iron
For our card, we will need some scrap cardstock with circles in a variety of sizes cut out of them - I have 2", 1-3-4", 1-1/2" and 1" punches that I used to cut out the circles. Start with Balmy Blue and the largest circle and ink blend color onto the surface of the cardstock (remembering to use the side that touched the wax paper). Add several circles scattered around the piece. Switch to the next smallest circle and Azure Afternoon. Add more circles with light pressure - some of these will overlap the previous circles. Switch to the next smaller circle and apply the same color, but more intense. Finally, add Blueberry Bushel with the smallest circle to complete the bokeh look. If you need to go back and add more of any of the circle sizes or colors, that's fine. Trim this piece to be 4" x 5-1/4".
Since the blending brushes are out and inky, it's a good idea to add a few circles to the inside panel of white and the envelope at this time. These circles won't have the textured look, but they will carry over the bokeh theme.
On the small rectangle of white, stamp the bird in black ink on the right side. Color with blends and fussy cut him out. From the other side of this rectangle, cut out the third largest circle from the Stylish Shapes dies. Before adding the penguin to the circle, take one of the circle templates and cut a wavy edge. Use the blending brushes to add some color to the bottom third of the circle - sort of like an iceberg. Add the penguin with Dimensionals.
Stamp the sentiment on the strip of white with Azure Afternoon ink and flag the ends. Stamp the sentiment on the inside panel. Assemble the card by placing the trimmed bokeh piece on the card base, which was folded in half and creased with a bone folder. Add the sentiment and circle with Dimensionals and glue the inside panel. Isn't this simply adorable??
My next card features the Wooly Friends bundle. The textured background was inked with Gray Granite. Two of the sheep were stamped on white and then filled in with stamped off Gray Granite. The last sheep was stamped on Gray Granite cardstock (which was also used to make a paper ribbon behind the sentiment circle). Pairing this with Daffodil Delight makes this a perfect gender neutral baby card!
Fragrant Layers has been a favorite of mine since it was released. I paired Crisp Cantaloupe (a new In Color) with Lemon Lime Twist for a fresh look. I blended my panel with Lemon Lime Twist before cutting it into strips. These were then placed diagonally over a panel of white, trimmed and matted with Lemon Lime Twist cardstock. The flowers were stamped in black and filled in with the Crisp Cantaloupe, Lemon Lime Twist and Daffodil Delight. Unfortunately, you do have to fussy cut this cluster of flowers, but I think it's worth it! Pop this up with Dimensionals and add a few 2026-2028 In Color Butterflies.
Earlier this month, I asked my Facebook followers which they preferred - cats or dogs - after showing them two strips of critters from the Cutest Crew bundle. Dogs were the winners and I make a card featuring them. Here is the runner up with the cats and I don't think the cat people will feel slighted at all! I colored the cats in a variety of blends and popped them up on a panel colored with Golden Glow (another new In Color). Before I added it to my card base, I tied a bow with the Golden Glow Bordered Ribbon. Lastly, I added my sentiment and some 2026-2028 In Color Dots.
This next card features Piglet and Eeyore and a label that was masked to have a white border. I used the Sweet Words & Labels bundle and selected the label size I wanted. Then I cut the next smaller label out of scrap cardstock and used that as a mask to ink blend Hydrangea Hue (another new In Color) on the piece of textured background. Then I cut it out with the larger die, which made this beautiful layered look label. I stamped and colored the two friends (Sweet Old Friends bundle) with Blends and cut them out with dies before popping them up with Dimensionals. The background panel is embossed with the Hundred Acre Woods folder. After adding the label, the bow was tied from the Hydrangea Hue Bordered ribbon and the panel was added to the card base.
This card shows another way you can use the wax paper to get a different textured look. Instead of crumpling it, run it through an embossing folder. I used the Fern & Flora folder to get this beautiful panel. Depending on the design on your folder, one side may look better than the other. For example, I showed the second piece in the
video and while it looked OK after inking, the pattern wasn't quite as distinct as this one, which I colored with Secret Sea and Peaceful Pine (yet another new In Color). I used the Fern & Flora bundle to make the cluster of greenery. The stamped leaves were colored with the Peaceful Pine Shimmer Brush and have that little sparkle that adds a special touch. The ribbon is the Secret Sea Bordered Open Weave ribbon and the embellishments are the Natural Matte Dots.
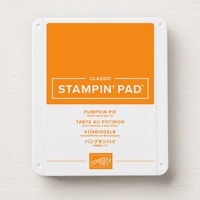
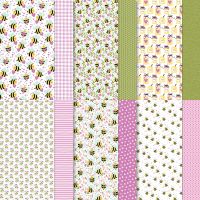
My last card utilizes the spent wax paper. After you iron the piece, the wax paper doesn't have to be thrown away and you can use it anywhere you would use vellum. I cut out the wax paper with the Sweet Words & Labels dies (the same one I used on the Piglet/Eeyore card) and used it behind my cluster of flowers and leaves. These were made by using sponge daubers and the Paradise Garden bundle. For the flowers, I chose Daffodil Delight and Pumpkin Pie and for the leaves, I used Lemon Lime Twist and Granny Apple Green. The background paper is from the Brights Painted Patterns DSP and the label was heat embossed and embellished with Shimmering Dots.
This is such fun and easy technique and the results are just so interesting! Have fun with it and share what you make on my Facebook group.
Karen
ThePowerOfACard@gmail.com
Shop my Store!
https://www.stampinup.com/?demoid=2219347
If you don’t have an on-line account with me as your demonstrator, please go to my store and get one.
https://ThePowerOfACard.blogspot.com
Images Copyright Stampin’ Up!®
Find me on Facebook - The Power of a Card or
Join my Facebook Group (The Power of a Cardmaker): https://www.facebook.com/groups/1042676296088278/?ref=share
When you shop, you earn rewards! For any purchase above $20, you will earn 10% in rewards to spend on a future purchase. And you don’t have to use them all at once as you can save up rewards to get something big for free!
Product List


![Wild Bunch Photopolymer Stamp Set (English) [ 167987 ]](https://assets1.tamsnetwork.com/images/EC042017NF/167987s.jpg "Wild Bunch Photopolymer Stamp Set (English) [ 167987 ]")
![Azure Afternoon 8 1/2" X 11" Cardstock [ 161719 ]](https://assets1.tamsnetwork.com/images/EC042017NF/161719s.jpg "Azure Afternoon 8 1/2\" X 11\" Cardstock [ 161719 ]")
![Basic White 8 1/2" X 11" Cardstock [ 166780 ]](https://assets1.tamsnetwork.com/images/EC042017NF/166780s.jpg "Basic White 8 1/2\" X 11\" Cardstock [ 166780 ]")
![Balmy Blue Classic Stampin' Pad [ 147105 ]](https://assets1.tamsnetwork.com/images/EC042017NF/147105s.jpg "Balmy Blue Classic Stampin' Pad [ 147105 ]")
![Azure Afternoon Classic Stampin' Pad [ 161663 ]](https://assets1.tamsnetwork.com/images/EC042017NF/161663s.jpg "Azure Afternoon Classic Stampin' Pad [ 161663 ]")
![Blueberry Bushel Classic Stampin' Pad [ 147138 ]](https://assets1.tamsnetwork.com/images/EC042017NF/147138s.jpg "Blueberry Bushel Classic Stampin' Pad [ 147138 ]")
![Tuxedo Black Memento Ink Pad [ 132708 ]](https://assets1.tamsnetwork.com/images/EC042017NF/132708s.jpg "Tuxedo Black Memento Ink Pad [ 132708 ]")
![Stylish Shapes Dies [ 159183 ]](https://assets1.tamsnetwork.com/images/EC042017NF/159183s.jpg "Stylish Shapes Dies [ 159183 ]")
![Basic Black Stampin' Blends Combo Pack [ 154843 ]](https://assets1.tamsnetwork.com/images/EC042017NF/154843s.jpg "Basic Black Stampin' Blends Combo Pack [ 154843 ]")
![Golden Glow Stampin’ Blends Combo Pack [ 167682 ]](https://assets1.tamsnetwork.com/images/EC042017NF/167682s.jpg "Golden Glow Stampin’ Blends Combo Pack [ 167682 ]")
![Blending Brushes [ 153611 ]](https://assets1.tamsnetwork.com/images/EC042017NF/153611s.jpg "Blending Brushes [ 153611 ]")
![Multipurpose Liquid Glue [ 110755 ]](https://assets1.tamsnetwork.com/images/EC042017NF/110755s.jpg "Multipurpose Liquid Glue [ 110755 ]")
![Stampin' Dimensionals [ 104430 ]](https://assets1.tamsnetwork.com/images/EC042017NF/104430s.jpg "Stampin' Dimensionals [ 104430 ]")
![Basic White Medium Envelopes [ 159236 ]](https://assets1.tamsnetwork.com/images/EC042017NF/159236s.jpg "Basic White Medium Envelopes [ 159236 ]")
![Paper Trimmer [ 152392 ]](https://assets1.tamsnetwork.com/images/EC042017NF/152392s.jpg "Paper Trimmer [ 152392 ]")
![Stampin' Cut & Emboss Machine [ 149653 ]](https://assets1.tamsnetwork.com/images/EC042017NF/149653s.jpg "Stampin' Cut & Emboss Machine [ 149653 ]")