As a Stampin' Up! demonstrator, this time of year is filled with mixed feelings! There is the excitement of the new annual catalog and the announcement of the new batch of In Colors, but then, there is the disappointment and sadness of retiring products to make space for the new items! If you've ever been to a class at my house, you know that I have never sold my retired stamp sets/dies, but because they are no longer available for purchase, they don't see much use in my classes and videos. The retired products can be found in the Last Chance section of my online store and as you might guess, they are while supplies last. In fact, between filming and releasing my video some items have already sold out.
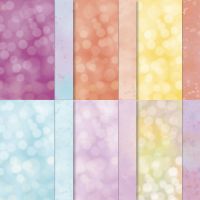
The five new 2025-2027 In Colors are Strawberry Slush, Timid Tiger, Darling Duckling, Secret Sea and Cloud Cover. One of the perks of being a demonstrator is that I can get some of the new products early and I was able to get the stamp pads and paper packs. Unfortunately, the Cloud Cover ink did not pass our strict quality control standards, so this is not currently available. In my video, I show you each of the new papers along with samples of the closest colors from our current line of colors. I find it helpful to see where the new colors fit with the regular range of colors and hope you do too.
I forgot to mention this in my video, but I just had my five year anniversary for YouTube! I started during the pandemic and have released a video every two weeks (or more frequently as I started expending my channel), never missing a single a week. I am so thankful for all of you who support me in this effort - it takes a lot of time and effort, but I am often rewarded with the sweetest comments. For this video, I wanted to focus on some of my favorites that will no longer be carried, but use them with the new colors so you see them with a fresh perspective. I hope you like them all!
Gather your supplies:- Cardstock: Timid Tiger 6-1/2" x 5-1/2"(scored at 4-1/4"), 4-1/4" x 4-1/4"; Basic White (2) 4" x 5-1/4", 2" x 3-1/2"
- Dies: Wanted to Say, Something Fancy
- Stamps: Sketched Plaid, So Sincere
- Ink: Timid Tiger
- Embellishments: Adhesive Backed Dappled Dots
- Adhesive and Tools
This card base only has half of the front. After scoring at 4-1/4", give the crease a good press with the bone folder. For the large plaid stamp, I placed it on a large block and sat it upside down on my work table. If you don't have a large block, just put your stamp on your table - it will work just fine. Ink the stamp and set the first piece of white on top. Then cover it with a scrap piece of paper so you can rub a block all over the paper. This is a great technique for any large background stamp to get better coverage. Repeat this with just the side of the envelope.
 |
| Love those little hearts! |
From the piece of Timid Tiger paper, die cut the words, three flowers, grouping of hearts and the label. Lengthen the label by about 3/4". (I explain how to do this, but click on this
short video to see it a bit more.) From the small white piece, die cut the bubble (or outline) words. Layer the words and outline piece - I like to use a bottle with a small nozzle to help me get just a bit of glue. I give this bottle as a bonus when you purchase my adhesive kit (Mini and Regular Dimensionals, Mini Glue Dots, Multipurpose Glue) - then just add your multipurpose glue. Add the words to the label.
To assemble the rest of the card, cut the plaid panel in half so you have two pieces that are 2" x 5-1/4". Adhere the left side to the card front. The second half will be added to the right side of the other white panel, but stamp the sentiment first (in case it smudges and you need to turn it over). Add the string of hearts next to your sentiment.
On the front side of the card, add the label with three Dimensionals - make sure the dimensionals are only on the left side so they won't show when the card is opened. Use Mini Dimensionals to add the tree flowers, then add a Dappled Dot in the center. Now that the card is finished, which color is your favorite - Strawberry Slush like I first showed, or the Timid Tiger that I made in the
video?
From the same set of Wanted to Say dies, I used Happy Birthday and paired it with the Take to the Sky DSP. While the color in the DSP is not Secret Sea, it looks great together! For the label behind the words, I used the Countryside Corners dies and the inside and envelope sentiments are from the Hooray for Surprises set. This turned out to be a great masculine card!
The Cheerful Daisies bundle is no longer available; only the dies (sad face). As you can see, I stamped the flowers and sentiment with Darling Duckling ink and paired it with Old Olive leaves and greenery. Again, I used the So Sincere stamp set for my inside greeting - that set is really a go to one for me.
While this set hasn't been available for a long time, it was one of my favorites - Memorable Blooms! I believe the dies are already sold out, but the stamp set is still there. I also used my very favorite embossing folder - Distressed Tile 3D. It is a beautiful texture and goes with so many stamps, especially since it is more of a background texture than a specific design. I colored the flowers and leaves by picking up ink on a block and applying it to the stamped image with an Aqua Painter. Normally, I would only do this on watercolor paper, but since it was small images and only lightly applied, it was OK. I also added some 2025-2027 In Color Flat Pearls and Wink of Stella - isn't this color pairing so pretty??
Happiest Day was another favorite of mine and I'm sad to see it too is sold out. You can still be inspired by this easy layout. I stamped designs on strips of three of the new colors and placed them diagonally across my card front. The label is from Something Fancy dies and the twine is from the Pack Your Babs Twine Three-Pack (which had a sneak peak of Strawberry Slush before it was even announced!).
Sentimental Park was another set I used quite often - you may remember it from when I did my color buddies video. I believe only the dies are left, but here is the lovely card I made with Cloud Cover and Secret Sea. I used the sympathy sentiment from Country Flowers, another stamp I use quite often! Because of not having the Cloud Cover ink, I stamped off Secret Sea for the inside of my flowers.
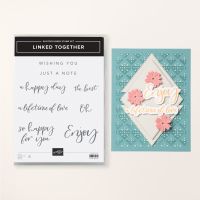
For my Autumn Leaves card, I used Darling Duckling, Timid Tiger and Cajun Craze - aren't they so perfect together? The diamond is from the Linked Together dies and the embossing folder is Dashing Designs 3D, another fabulous background folder! Adding a little bow with Linen Thread is the perfect finishing touch.
My last card features Beside Me - a great set for fathers and their kids! I took a piece of Cloud Cover, spritzed it with alcohol and scrunched it up. After flattening it, it leaves a wonderful worn texture and distressed edges. An oopsie on my part was using the Everyday Details dies - they are long gone but were mixed up in my stack of Last Chance products. It was this card that led me to pairing Misty Moonlight with Cloud Cover, so I'm showing it to you anyway!
There are plenty of items left in the Last Chance list - some even have discounts! Please check them out and stock up on some great items while earning rewards you can spend on a future purchase. The new rewards program has started - just make sure you have an account with me as your demonstrator and your rewards will accumulate for all purchases over $20. You can save them or spend them as you please.
Karen
ThePowerOfACard@gmail.com
Etsy Shop: The Power of a Card
Shop my Store!
https://ThePowerOfACard.blogspot.com
Images Copyright Stampin’ Up!®
Find me on Facebook - The Power of a Card or
Join my Facebook Group (The Power of a Cardmaker): https://www.facebook.com/groups/1042676296088278/?ref=share
The new rewards is here! For any purchase above $20, you will earn 10% in rewards to spend on a future purchase. And you don’t have to use them all at once as you can save up rewards to get something big for free! If you don’t have an on-line account with me as your demonstrator, please go to my store and get one.


![Wanted To Say Dies [ 161594 ]](https://assets1.tamsnetwork.com/images/EC042017NF/161594s.jpg "Wanted To Say Dies [ 161594 ]")
![Something Fancy Dies [ 160424 ]](https://assets1.tamsnetwork.com/images/EC042017NF/160424s.jpg "Something Fancy Dies [ 160424 ]")
![Sketched Plaid Cling Stamp Set [ 161424 ]](https://assets1.tamsnetwork.com/images/EC042017NF/161424s.jpg "Sketched Plaid Cling Stamp Set [ 161424 ]")
![So Sincere Cling Stamp Set (English) [ 162283 ]](https://assets1.tamsnetwork.com/images/EC042017NF/162283s.jpg "So Sincere Cling Stamp Set (English) [ 162283 ]")
![Adhesive Backed Dappled Dots [ 163353 ]](https://assets1.tamsnetwork.com/images/EC042017NF/163353s.jpg "Adhesive Backed Dappled Dots [ 163353 ]")
![Hooray For Surprises Photopolymer Stamp Set (English) [ 162851 ]](https://assets1.tamsnetwork.com/images/EC042017NF/162851s.jpg "Hooray For Surprises Photopolymer Stamp Set (English) [ 162851 ]")
![Take To The Sky 12" X 12" (30.5 X 30.5 Cm) Designer Series Paper [ 163436 ]](https://assets1.tamsnetwork.com/images/EC042017NF/163436s.jpg "Take To The Sky 12\" X 12\" (30.5 X 30.5 Cm) Designer Series Paper [ 163436 ]")
![Countryside Corners Dies [ 161471 ]](https://assets1.tamsnetwork.com/images/EC042017NF/161471s.jpg "Countryside Corners Dies [ 161471 ]")
![Cheerful Daisies Dies [ 161296 ]](https://assets1.tamsnetwork.com/images/EC042017NF/161296s.jpg "Cheerful Daisies Dies [ 161296 ]")
![Memorable Blooms Cling Stamp Set (English) [ 164816 ]](https://assets1.tamsnetwork.com/images/EC042017NF/164816s.jpg "Memorable Blooms Cling Stamp Set (English) [ 164816 ]")
![Distressed Tile 3 D Embossing Folder [ 162189 ]](https://assets1.tamsnetwork.com/images/EC042017NF/162189s.jpg "Distressed Tile 3 D Embossing Folder [ 162189 ]")
![Pack Your Bags Twine Three Pack [ 165582 ]](https://assets1.tamsnetwork.com/images/EC042017NF/165582s.jpg "Pack Your Bags Twine Three Pack [ 165582 ]")
![Sentimental Park Dies [ 160566 ]](https://assets1.tamsnetwork.com/images/EC042017NF/160566s.jpg "Sentimental Park Dies [ 160566 ]")
![Country Flowers Photopolymer Stamp Set (English) [ 163405 ]](https://assets1.tamsnetwork.com/images/EC042017NF/163405s.jpg "Country Flowers Photopolymer Stamp Set (English) [ 163405 ]")
![Autumn Leaves Photopolymer Stamp Set (English) [ 162179 ]](https://assets1.tamsnetwork.com/images/EC042017NF/162179s.jpg "Autumn Leaves Photopolymer Stamp Set (English) [ 162179 ]")
![Dashing Designs 3 D Embossing Folder [ 163483 ]](https://assets1.tamsnetwork.com/images/EC042017NF/163483s.jpg "Dashing Designs 3 D Embossing Folder [ 163483 ]")
![Linked Together Dies [ 164808 ]](https://assets1.tamsnetwork.com/images/EC042017NF/164808s.jpg "Linked Together Dies [ 164808 ]")
![Beside Me Cling Stamp Set (English) [ 160780 ]](https://assets1.tamsnetwork.com/images/EC042017NF/160780s.jpg "Beside Me Cling Stamp Set (English) [ 160780 ]")