I am posting this early, so if you read it before April 21st at 7 am, you won't have access to the video. The reason for that is I am moving and the movers will be at my house on the 20th and 21st! With all the packing and sorting and donating and moving things into the apartment or storage unit, it has been super crazy here! I had to film the video early because as you might imagine, packing up my stamping supplies took just a little bit of time. At any rate, I hope you enjoy these cards.
Gather your supplies:- Cardstock: Purple Posy 5-1/2" x 11"; Basic White 3-1/2" x 5-1/4", 4" ish x 1"; Ice Cream Corner DSP 4" x 5-1/4", 3 x 5-1/4"
- Stamp: Sweet Ice Cream
- Ink: Blackberry Bliss
- Banners Pick a Punch
- Blackberry Bliss Ribbon 20"
- Adhesive and Tools
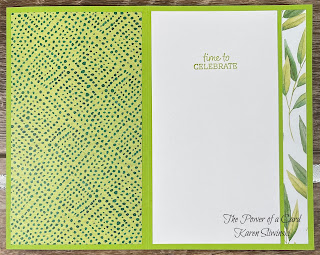
Our card base is different from the normal base and it actually needs to only be 10-3/4" long, but I like to cut this after I do the scoring because sometimes, it's fun to cut off a tiny slice to add to the inside as you can see in the video (and some of the photos with other papers).
The first thing you need to do is score this piece at 3-3/4" and 7". Fold and burnish with the bone folder. Take the larger piece of DSP and trim off 1/2" on the right side. Adhere this small strip to the edge of the white panel. Adhere the remaining larger DSP piece to the front panel. When the card is fully assembled and folded, the pattern will appear continuous.
Add the 3" piece of DSP to the second flap. It's fun to add a contrasting design - there are so many to select from! Before adding the white panel, decide if you want to add a sliver of the card base color next to the strip of DSP. If so, place the card in its folded position into your trimmer and cut off a tiny slice of the card base on the right side. Then trim the folded card to 4-1/4" wide. Now adhere the white decorated panel.
Fold your ribbon in half and place the fold at the left side of the card, near the bottom third of the card. This position may change depending on the size of your label. When you like the position, add a little Seal+ on the front of the card to hold the ribbon under where your label will go.
Stamp your Happy Birthday sentiment on the 1" white strip with Blackberry Bliss and trim with the Banner punch and trimmer. Using dimensionals, add this to the front of the card over the ribbon. Stamp your interior sentiment and tie the ribbon into a bow. That's it! So fast and simple.
As I mentioned in the video, you could add a glue dot to a gift card and stick it to the second panel to make this a real treat of a card. Here are some other cards I made with this layout. It is a fantastic way to showcase your DSP and the presentation is so lovely, your recipient will think you worked really hard to make their card!


Karen
ThePowerOfACard@gmail.com
Etsy Shop: The Power of a Card
https://karensliwinski.stampinup.net
Images Copyright Stampin’ Up!®
Join my Facebook Group (The Power of a Cardmaker): https://www.facebook.com/groups/1042676296088278/?ref=share
My current host code is: FEUZGJPR Please use this for orders less than $150 and you’ll get a special treat from me. For order over $150, you will qualify for host rewards from Stampin’ Up! (plus a treat from me!).


No comments:
Post a Comment