Tuesday, October 15, 2024

Two Tone Cardstock and the New Scrapbooking Line

When Close to My Heart closed their doors, Stampin' Up! reached out to them and developed a plan to welcome their Makers into the SU demonstrator family and carry over some of their products, especially those developed for Scrapbooking.  As part of that transition, Stampin' Up! has started offering Two Tone Cardstock in some of the SU colors!  There are also a variety of other products, ranging from special paper packs, to stamps, to Scrapbooking Workshop Kits - all designed to help you make scrapbooking easy and fun!  But these products aren't just for scrapbookers!  They are perfect for cardmakers too!

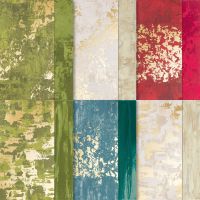
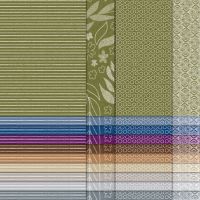
In this video, I am focusing on the Two Tone Cardstock.  However, I have several card samples made from the Halloween Memories Scrapbooking Workshop kit and I briefly show this kit in the video.  I really love the new Two Tone papers!  They are available only in limited SU colors right now, but soon will be available in all of our core colors.  They are 12" x 12" and are a lighter weight than our normal cardstock.  The core of the paper is white and the colors are printed with ink with one side being the SU color you know and love, and the other side being a lighter shade of that color.  Here are just some of the reasons why I love this new paper:

  1. The white core allows fun techniques like sanding (shown in this video) and tearing
  2. The paper is lighter, so when you add layers, you are not adding a lot of weight
  3. They are perfect for making color cooridnated mats and layering dies
  4. You have so many more color choices - it's like stamping off to get a lighter tone, only with paper!

Currently, this new product line is not shown in any of our printed catalogs.  So when you go to my store,  search for scrapbooking and you'll see all the new and exciting products.  New Scrapbooking Workshop Kits will be released regularly (and I'm assuming new Two Tone Cardstock packs will too!).  Now let's dive in and make this fun card!

Gather your supplies:

  • Cardstock: Thick Basic White 8-1/2" x 5-1/2"(scored at 4-1/4"); Pool Party Two Tone Cardstock 2-1/4" x 5-1/4"; Pool Party Striped DSP from the Halloween Memories Scrapbooking Workshop Kit 2" x 5-1/4"; Basic White 3" x 3"
  • Stamp:  Happiest Day
  • Die: Spotlight on Nature
  • Embossing Folder: Fun Patterns
  • Inks:  Memento Black, Pool Party
  • Embellishment: Glossy Dots Assortment
  • Sanding Block
  • Adhesive and Tools
This adorable birthday card comes together in a snap!  Start by folding the card base in half and giving it a good press with the bone folder.  Emboss the Pool Party piece by placing the dark side up in the folder that has a flower design.  When you look at the closed folder, you should see the dark side and be able to read the SU logo.  At the Stampin' Cut and Emboss machine, emboss this panel and cut out the circle from the Spotlight on Nature dies in Basic White.

Years ago, Stampin' Up! used to carry a sanding block and I still have mine.  If you don't have one, any fine grit sanding block will work.  Gently rub the block all over the raised design on the Pool Party panel.  This will remove that top layer of ink to reveal the white core and the result almost looks like you embossed the paper with white!  Adhere the striped Pool Party piece to the front of the card base on the right side, leaving a 1/8" border on the top, bottom and right sides.  Adhere the embossed panel onto the left side, again leaving a 1/8" border.  

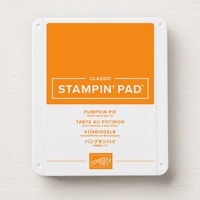
Stamp the dragonfly and sentiment onto the die cut circle in Memento Black ink.  Add the wings with Pool Party, stamping off the larger wings to get a lighter shade.  Pop this up with Dimensionals on the front and stamp the inside sentiment in black.  Add another dragonfly to the corner of the envelope as the finishing touch.  Which color scheme to you like best - Pool Party or the original one I made with Pumpkin Pie?


My first sample illustrates the benefit of a white core and the technique of tearing paper.  I used the Autumn Leaves stamp set to add leaves to a panel of Basic White using Pecan Pie, Pumpkin Pie, Daffodil Delight, Real Red, Cajun Craze, Cherry Cobbler and Old Olive.  I used a Stampin' Write Marker to add some ink spritzes.  Then I tore a piece of the Pecan Pie Two Tone Cardstock (TTCS) and adhered it to both top and bottom of the leaf panel.  I finished by adding the reverse (darker) side of the same TTSC.  The scrap left behind from my tearing looked so interesting, I added it to the inside of my card.  I really love the look of tearing this paper and seeing the white edge contrasting the two solid colors!


The Caring Leaves stamp set was perfect for my next card.  I stamped the leaves on 1-1/2" x 2" pieces of Basic White with Pean Pie, Pumpkin Pie and Cajun Craze.  Then I layered them with the same colors of TTCS by gluing the two colors together, then adding the white layer with Dimensionals.  I used my Paper Trimmer to add scored lines above and below the row of leaves.  The sentiment is from Latte Love.


The papers in this card are from the Autumn to Remember Two Tone Cardstock pack.  It has a selection of TTCS as well as some DSP that is not in any of our other offerings.  I chose the Mossy Meadow TTCS to make the Happy Birthday using the Wanted to Say dies.  I love how this simple masculine birthday card turned out!

My next two cards use the papers from the Halloween Memories Scrapbooking Workshop Kit.  I did very little stamping and mainly used the stickers and paper to make these cards.  I used 1/2" strips on a Basic Black panel for the first one and the only thing I stamped was Love You (from the Happy Little Things stamp set) on the inside with Granny Apple Green and Gorgeous Grape.  On the second card, I cut 1" squares of the Pool Party TTCS and adhered it to the back of the strip of books.  I added the three lighter squares first, then added the darker side squares, shifting them down so that only a smaller section showed.  The BOO was made using the Mini Alphabet dies.


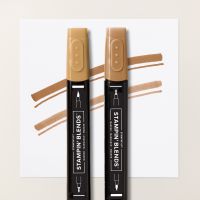
On this card, you get to see both sides of the Garden Green TTCS (from the Reindeer Memories Two Tone Cardstock pack) at the same time.  I simply scored the corner and folded it over.  Before gluing it down, I stamped snowflakes from the Sweetest Star Bundle in the same color ink to add texture.  I colored Santa and Mrs. Claus with Stampin' Blends.  The circle sentiment is from Stylish Shapes and stamped in Real Red.


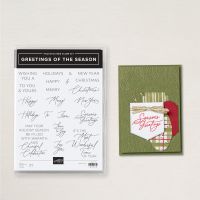
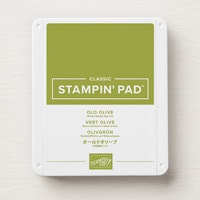
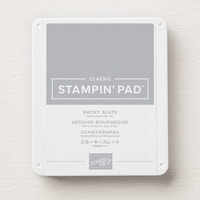
My final card features the lovely pine tree from the Peaceful Evergreens set.  I stamped the tree in Old Olive and the snow on the ground in Smoky Slate.  I used the Old Olive TTCS from the Autumn to Remember pack and the Deckled Rectangles dies.  Before adding these to my card, I added a 4" x 5-1/4" layer of Basic White embossed with the So Swirly embossing folder.  The Merry Christmas sentiment is from Greetings of the Season and the inside sentiment is from Peaceful Season, all stamped in Old Olive.  I especially love this Old Olive TTCS because the lighter shade reminds me of Pear Pizzaz, which to my great disappointment, was retired.

I encourage you to try this new cardstocks in two tones - they are so very versatile!  You can browse my store, or simply click on the links below to add them to your shopping card!  Thanks for reading and watching my video!

Karen


ThePowerOfACard@gmail.com

Etsy Shop: The Power of a Card

Shop my Store!

https://ThePowerOfACard.blogspot.com

Images Copyright Stampin’ Up!®


Find me on Facebook - The Power of a Card or

Join my Facebook Group (The Power of a Cardmaker):  https://www.facebook.com/groups/1042676296088278/?ref=share


My current host code for October is: VE2WUZ4V.

Please use this for orders less than $150 and you’ll get a special treat from me.

For orders over $150, you qualify for host rewards from Stampin’ Up! (plus a treat from me!).


Card, Handmade, Paper Crafting, Stampin' Up!, ThePowerOfACard, ThePowerOfACard.blogspot.com 


Tuesday, October 1, 2024

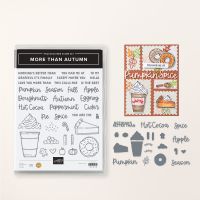
All About the More Than Autumn Bundle!

Fall is one of my favorite seasons!  I love the changing leaves, cooler temperatures, pumpkin treats and the fun family gatherings during this season.  So when the new mini catalog was released, this bundle was at the top of my wish list!  This bundle has 36 stamps (twelve of those have coordinating dies) and 23 dies (ten are standalone shapes)!  The words a builder phrases in two sizes - which means you can mix and match to make your sentiments.  The little decorative shapes include an apple, pumpkin, candy cane, cinnamon stick, heart, gingerbread man and straw.  There is even a die so you can make a dollop of whipped cream for your pie from the large whipped cream for your drink!  So much fun to be had!

Let's first look at the stamps and dies in my handy chart.  I love doing this because it really helps me design my cards when I can see all the combos in one place.  (It's also fun making them!)

In the card I make during the video, I show two techniques - one is paper piecing (here's another video that shows paper piecing in more detail: Paper Piecing with Patterned Paper), and the second one is using a blending brush and masking paper to create a focal area on the front of our card.

Gather your supplies:

  • Cardstock: Pecan Pie 8-1/2" x 5-1/2"(scored at 4-1/4") and 3/4" x 1-1/4"; Pumpkin Pie 4" x 5-1/4"; Basic White 3-7/8" x 5-1/8", 7/8" x 5-1/2", 3" x 1-3/4" and 4" x 5-1/4"
  • Stamp Bundle:  More Than Autumn
  • Die: Greetings of the Season
  • Inks:  Memento Black, Pumpkin Pie, Smoky Slate
  • Ribbon: Baker's Twine Essentials 6"
  • Masking Paper
  • Adhesive and Tools including a Blending Brush

As we begin to make our card front, we need to cut a shape from the Masking Paper.  I chose one of the larger tags from the Greetings of the Season dies.  Start by pealing off one part of the backing.  Before adding this to the 3-7/8" x 5-1/8" panel of white, stick it on your shirt or pants to get rid of a little bit of the stickiness.  Position it right in the middle of the panel and then peal off the remaining backing (again, sticking it on your clothes first).  I added a little piece of transparent tape over the hole so I wouldn't get and inky dot in the middle of my white space!

With the large Blending Brush, load it with Pumpkin Pie ink.  Normally when we blend color onto our cardstock, we like to get a smooth blend by blending in circles.  For this application, I want rays of color, much like you see sun shining through clouds.  Place the brush in the center of the masking paper and swipe outwards towards the edge of the panel.  You will get stripes or bands of color.  Overlap these bands of color as you work around the panel.  Adhere this panel to the Pumpkin Pie piece.

Stamp eight gingerbread men on the strip of white and color them with the Pecan Pie Blend.  Stamp the cup in black and the whipped cream in Smoky Slate on the small rectangle of white.  Stamp the cup again on the DSP so that the cup band is inked (we will cut this and do paper piecing).  Using the dies, cut out all of pieces, including the word spice from the scrap of Pecan Pie cardstock.  

Start by assembling the cup.  Trim the cup band right on the stamped line and adhere this to the cup.  Add the whipped cream on top.  Make a small slice in the whipped cream using the cutting blade in the Take Your Pick Crafting Tips (or an exacto knife) so that you can slip one of the gingerbread men into the whipped cream.  Add Mini Dimensionals at the head of six gingerbread men and position them in an arc for the sweet banner.  Once they are in place, it's easy to string the Baker's Twine under them and attach to the back of the front panel.  Stamp your sentiment, making sure you leave space for the word Spice.  Lastly, adhere Spice and the the decorated cup (with Dimensionals).

For the inside, stamp the sentiment on the remaining white panel but leave enough room to add the final gingerbread man above it.  Stamp a few more gingerbread men on the envelope corner or along the right edge.  Remember to stick a piece of scrap paper inside the envelope before coloring with Blends so that  you won't get bleeding on the back side of your envelope!

When I made my sample card, I chose Real Red as my pop of color instead of Pumpkin Pie.  I love the pairing with the gingerbread men and it seemed like a natural choice.  However, when I blended the color for the front panel, the red lost it's intensity and yielded an overall pink look.  While it still looks OK (and the streaking or rays look really good), it just wasn't what I had envisioned.  Perhaps if I had done more and more blending, it would look red enough, but I was worried I would lose the "rays" of color that I had wanted.  Which one do you like better?

The first card I made when I first got my bundle was a CASE of one in the catalog on page 49.  This is a wonderful way to use new sets - copy something that is already made and change it to fit your style or taste.  I adore pumpkin stuff - cookies, pies, beer, muffins, etc. so this layout suited me just great.  


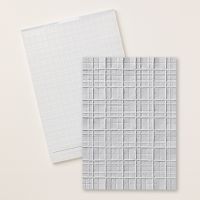
For my next layout, I was inspired by Krispy Kreme Doughnuts.  When that hot fresh light is on, those doughnuts just melt in your mouth!  Thankfully, there isn't one of them very close by so I'm not tempted too often!  Before embossing with my Forever Plaid 3D embossing folder, I cut out three Stylish Shapes circles so the doughnuts could peek out from the layer below.  I draped the Hot die cuts over the openings draw your eye to the sweets below.  I used Adhesive Foam Strips to pop up the plaid layer - it gives lots of support for this flimsy top panel.


This next card has simple elegance.  The Leaf Fall 3D embossing folder pair wonderfully with leaves in this set.  I added a tag from the Greetings of the Season Dies and adhered the leaves to that label.  Notice that I kept the innards of the die cut leaves so they were whole leaves, not just the outline as I showed in my chart.  A little Linen Thread was used to add the final touch.


Whenever I see apple cider, I think back many, many years ago when I went to a gathering where we made fresh cider - it was incredible!  Everyone brought apples and we dumped them all together to grind and press them into cider.  It was the most delicious cider I ever had.  So this card is a salute to that memory.  I used the Timber 3D embossing folder on a panel of Crumb Cake, but instead of leaving it plain, I used a Blending Brush to add a light coloring of Pecan Pie ink.  The tag (another from Greetings of the Season) was cut fro the Country Woods DSP and the ribbon is the Pecan Pie Center Stripe ribbon.


I got inspiration for this next card by one I saw on a Demonstrator Facebook page (my apologies to the creator - I didn't remember your name).  I used the A Little Latte DSP pack paired it with Pumpkin Pie, Peach Pie, Calypso Coral and Petal Pink and I was very happy with the results!


While this next one is a bit fussy, I wanted to show that you don't have to color your doughnuts.  I used the die to cut out the base of my doughnuts from Pecan Pie.  Then I stamped the doughnut again on Petal Pink and Calypso Coral cardstock.  Here is where the fuss comes - cutting them out.  After they were cut, I used the side of the brush tip end of my black Stampin' Write marker to color the cut edges.  This simple thing will give it a more polished look.  The background is the Dashing Designs 3D embossing folder (which is rapidly becoming one of my favorites!).


The last card shows off two techniques - paper piecing and brushing on Metallic Enamel Effects (How Do I Make Pearlized Backgrounds and Images).  I also used the Christmas Labels Bundle for the sentiment - it was absolutely perfect for this adorable peppermint hot cocoa card!  The paper is Take a Bow 6" DSP and those candies are the Red & White Peppermints (stinking adorable, aren't they?).

I had lots of fun making these cards and showing you lots of ways to use this bundle.  But I've seen lots more creative ideas using this bundle too - what will you come up with?  I'd love to hear what you make, or what was the most inspiring for you.  Happy Autumn!

Karen


ThePowerOfACard@gmail.com

Etsy Shop: The Power of a Card

Shop my Store!

https://ThePowerOfACard.blogspot.com

Images Copyright Stampin’ Up!®


Find me on Facebook - The Power of a Card or

Join my Facebook Group (The Power of a Cardmaker):  https://www.facebook.com/groups/1042676296088278/?ref=share


My current host code for October is: VE2WUZ4V.

Please use this for orders less than $150 and you’ll get a special treat from me.

For orders over $150, you qualify for host rewards from Stampin’ Up! (plus a treat from me!).


Product List

Two Tone Cardstock and the New Scrapbooking Line

When Close to My Heart closed their doors, Stampin' Up! reached out to them and developed a plan to welcome their Makers into the SU dem...