I recently participated in a watercolor stamp camp, the second one put together by my very talented upline, Dena Rekow. This one was even better than the first and I had a blast! So with all the excitement of doing the camp, I decided to feature a watercolor technique in my video this week. You don't need watercolors or a brush, but you will need watercolor paper! I show you how to color the entire sheet of Fluid 100 Watercolor paper and then how to cut it up so that you use every bit of it to make four cards.
In the camp, we did a lot of taping our paper to a board and then applying the paint/color. As long as you have a waterproof surface (a silicon baking sheet works great), you can apply water to your paper, turn it over and it will stick to the mat and not move as you add color. That is where we begin.
Gather your supplies:
- Cardstock: Fluid 100 Watercolor Paper
- Ink: Parakeet Party, Tahitian Tide, Blueberry Bushel
- Small Block
- Spritzer
- Paper Towel
- Stamp sets/dies and tools to make four cards as shown
Once you have your paper "stuck" to the waterproof surface, spritz more water all over the top. You want it fairly wet. Then with a small block, pick up color from the Parakeet Party ink pad and add it to your watercolor paper. Because the paper is quite wet, the color will spread easily. You don't want to color the entire surface - just get a good smattering of color. Each time you need to add more color, wipe off the block on a paper towel before touching it back on the ink pad. Repeat this process with Tahitian Tide and Blueberry Bushel until you get the amount of color blending you desire, adding more water with the spritzer as your paper dries out a bit. As you see in my
video, feel free to add more Parakeet Party after you have all three colors because the other colors can dominate. One note of caution - select colors that will blend well together. I chose analogous colors (those next to each other on the color wheel).
Now comes the hard part - letting it dry completely! I prefer to let it dry naturally but you can speed up the process by using your heat tool on low setting. I find it helps to lift the paper off your surface and set it on top of a cup or glass so air will get to both sides for faster drying.
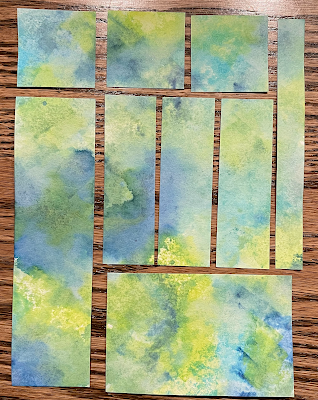
Time to cut up the sheet! Here is a cutting diagram to assist you. This is like a One Sheet Wonder, just with a 5" x 7" piece of paper. When you are done, you'll have pieces for four different cards and your watercolor paper will look like this. A general tip when adding these pieces to your cards - use lots of adhesive! Watercolor paper is thicker and doesn't lie very flat unless you have adhered the edges down completely.
I used a variety of stamp sets/bundles to make my cards (all of which are listed below), with matching cardstock as the base. The basic designs are versatile, so feel free to switch up the stamp sets and dies from something in your collection. Which one is your favorite? (I love the last one and just might make another sheet of watercolor "DSP" for this design only!)
Make sure you check out the new catalog! It was just released on May 2nd and has so many new colors (the color refresh is outstanding!) and fun new stamps. And if you want to make some cards with the new colors, come to my next Monthly Card class on May 16th at 6:30 pm.
Karen
ThePowerOfACard@gmail.com
Etsy Shop: The Power of a Card
https://karensliwinski.stampinup.net
https://ThePowerOfACard.blogspot.com
Images Copyright Stampin’ Up!®
Join my Facebook Group (The Power of a Cardmaker): https://www.facebook.com/groups/1042676296088278/?ref=share
Product List


No comments:
Post a Comment