Most of you know that I love dies and this set is a great new addition to my collection. The Greetings of the Season bundle includes a holiday greetings stamp set and this collection of 9 tags. However, they don't have to be used as just tags! There are some fabulous shapes and I will show you how to cut them out without a hole so you can use them as a regular label. I use partial die cutting (shown in both this video and one of my How Do I video shorts) to get rid of or add holes, along with changing the length of the label/tag. In my samples, I will also show you some of the other new products in our on-line exclusives line - let's get to it!
Gather your supplies:- Cardstock: Thick Basic White 4-1/4" x 11"; Basic White 4" x 5-1/4", 1-3/4"circle; Thoughtful Designs Specialty DSP 2-3/8" x 3-1/2", 3/4" x 4", 3/4" x 4-1/2"
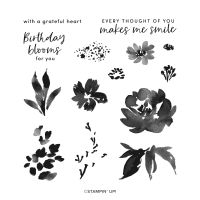
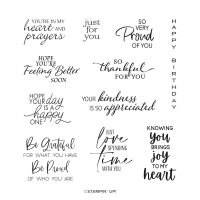
- Stamp Sets: Textured Florals, So Sincere
- Dies: Greetings of the Season
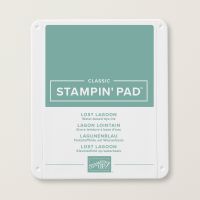
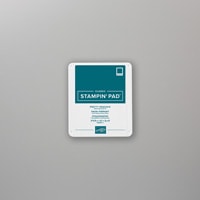
- Ink: Lost Lagoon, Pretty Peacock
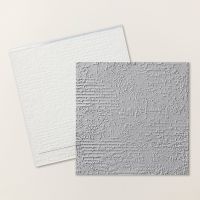
- Embossing Folder: Exposed Brick 3D
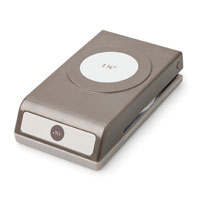
- Punch: 1-3/4" Circle
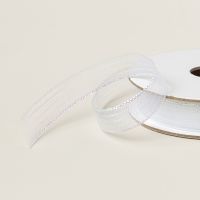
- Ribbon: Iridescent Striped Trim 15"
- Adhesive and Tools
Score the card base at 5-1/2" and fold in half, giving it a good crease with the bone folder. Emboss the panel of Basic White with the embossing folder and adhere directly to the card front. To cut the tag/label from the Thoughtful Designs paper, you will need to do partial die cutting. Since we want holes in both ends of the shape, start with the end with a hole and cut about three quarters of the die shape. Then turn the die over so the hole can be cut on the other end. You will feel the die lock into place over the part that is already cut. I did partial cutting again, even though you don't really need to since the other end won't alter the shape of the label.
Stamp the medium flower from the Textured Florals stamp set in Lost Lagoon onto the circle cut from the 1-3/4" punch, Then stamp the center part of the flower and sentiment in Pretty Peacock. Pop the circle up onto the label. Thread the ribbon through the label and adjust the ribbon so you have the ability to tie a bow on the left side as the ribbon wraps around the card front. Before actually knotting the ribbon, add dimensionals to the back of the label and center it on the card front. Then tie the knot and trim the excess ribbon.
To complete the card, simply add the birthday sentiment and a strip of the DSP along the bottom of the inside of the card. I finished with another strip of DSP along the left side of the envelope.
My next few cards are Christmas cards - you can never start soon enough on making them! You'll see lots from the Greetings of the Season stamp set. For the first one, I used the Graceful Greenery Vellum layered over white and matted with Old Olive. When I cut the label from Pecan Pie, I kept the hole and glued it back in before adding my Pecan Pie & Clear Ribboned Adhesive Backed Dots - this makes it better for sticking them down. The circle is from Stylish Shapes.
The greenery on the next card might surprise you - it's from the Citrus Blooms Dies. I cut it out twice - one in Old Olive and another in Mossy Meadow. Then before layering them together, I rotated one 180 degrees so you can see both colors at once. For the sentiments, I shortened the labels fit my words, then looped them all together with some linen thread and added them next to my Stylish Shape circle. I added the Iridescent Foil Gems for a little bling.
This gorgeous gate fold card uses two of the dies! For the large white one, I used partial die cutting to make a rectangle from the largest tag shape. I fussy cut some greenery from the Graceful Greenery Vellum and added that to the rectangle. The other label is added with some Baker's Twine Essentials and the Neutrals Adhesive Backed Sequins pick up the gold from the background, which is the Season of Green & Gold Specialty DSP. When preparing the card base (4-1/4" x 11"), score at 2-3/4" from each end and fold to the middle. Then place the DSP (4"' x 5-1/4") over the folded front, gluing just to one side. Then trim at the middle edge and adhere the remaining piece to the other side. I find this is the easiest way to it even and have the pattern match at the middle. Remember to pop up the white label only on the left side!

The new Filled with Cheer stamp set coordinates with the Filled with Fun Bundle, a previous on-line exclusive release. I used both of them for this adorable wagon full of gifts. The wagon, gifts and label were all colored with Blends. For this tag, I opted to have no holes.
With this tag, I used the Black and Very Vanilla Large Check Ribbon. First, I looped a short length of ribbon through the label, then I tied the ribbon around that ribbon to make a bow. I used Very Vanilla as my card base and the Citrus Blooms bundle for the sentiment and orange. To color the orange, leaves and flowers, I used Watercolor Pencils and a Blender Pen. I added the rectangle of Basic Black behind it all to really make it pop.
The Flowering Zinnias DSP makes this card super simple to make! I cut the largest label from the purple check and added a little rectangle in white for my sentiment. I fussy cut the flowers to place around the label and added that Iridescent Striped Trim ribbon to finish it off.
This pretty oval label, with no holes, is the perfect spot to add the birthday sentiment (which also uses the Everyday Greetings stamp set). I used the Country Flowers Bundle with Blends to make my bucket of flowers. The card base and panel (embossed with the Eyelet 3D embossing folder) are Gray Granite and the bottom strip of DPS is from the Neutrals 6" x 6" pack.
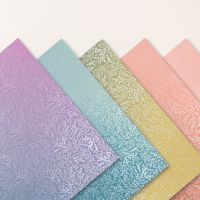
My last two examples feature the longest label. For the first card, I cut the tag the full length of the die and used the Unbounded Beauty DSP and the 2024-2026 In Color Glimmer Specialty DSP. I stamped my birthday sentiment in Petunia Pop from the So Sincere stamp set. More of the Iridescent Striped Trim and the 20204-2026 In Color Shimmer Gems finish off the front. (I use the Flowers of Beauty stamp set to decorate the inside and envelope). The second card uses the Everyday Greetings and shortened tags. My stamping is done in Melon Mambo and Pretty in Pink, which coordinates with the Countryside Rose DSP, a special pack of paper that I earned as an incentive. (It has all the patterns of the Countryside Inn DSP pack, just in pinks instead of blues.) Some Baker's Twine allowed me to string up the banner for my best friend's birthday card - I hope she likes it!
Hole or no hole, full size or shortened - this die set is a great investment for your craft room! Combine it with the two greetings stamp sets and you'll have a a great base for many, many cards and occasions.
Karen
ThePowerOfACard@gmail.com
Etsy Shop: The Power of a Card
Shop my Store!
https://www.stampinup.com/?demoid=2219347
https://ThePowerOfACard.blogspot.com
Images Copyright Stampin’ Up!®
Find me on Facebook - The Power of a Card or
Join my Facebook Group (The Power of a Cardmaker): https://www.facebook.com/groups/1042676296088278/?ref=share
My current host code for August is: 67PHRH2X.
Please use this for orders less than $150 and you’ll get a special treat from me.
For orders over $150, you qualify for host rewards from Stampin’ Up! (plus a treat from me!).








No comments:
Post a Comment